Supplies you will need:
Non corrugated cardboard, one moldable and one stiff
Scissors
Exacto Knife
Tape Measure
Paper
Masking Tape
Elmers Glue
Crafting Black, White, and Silver Paint
Sponge and Sponge Brush
Fat Ribbon
Wooden Rod
Christmas Bells
Hammer
Nail
For the Oval hat Trace your cone into an oval shape to work on the stiff cardboard to make top and brim of hat. Then after you have traced your oval, use it like a clock and measure anywhere from an inch to two inches at each point on a clock away from the oval. Then connect the dots to create your outer oval. Cut them out and tape them together. Follow process like the video shows.
Doll: Blue Loom
Baby: Red Loom
Children: Green Loom
Adult: Yellow Loom
Supplies:
Circular Looms
Looming Hook
Crafters Needle
Crochet Hook
Yarn of choice
Terms
Cast On: CO
E-Wrap: EW
Purl: P
Wrap and Turn: W&T
Draw String Cast Off: DSCOF
Cast Off: COF
Base Pattern Using Doll Size
24 peg loom, circular
CO 24 pegs
Row 1: EW
Row 2: P
Row 3-6: EW
Row 7: Work Flat, EW 11, W&T peg 12
Row 8: EW 10, W&T peg 11
Row 9: EW 9, W&T peg 10
Row 10: EW 8, W&T peg 9
Row 11: EW 7, W&T peg 8
Row 12: EW 6, W&T peg 7
Row 13: EW 24 new starting point, work circular
Row 14-22: EW
Decrease every other peg DSCOF
Bill: Work Flat
CO 12 pegs
Row 1: EW
Row 2: EW 11, W&T peg 12
Row 3: EW 10, W&T peg 11
Row 4: EW 9, W&T peg 10
Row 5: EW 8, W&T peg 9
Row 6: EW 7, W&T peg 8
Row 7: EW 6, W&T peg 7
Row 8: EW 9
Row 9-13: EW
Bring original cast on loops onto the pegs as if you were making a brim on a circular hat, and cast off. Sew the brim onto the hat and sew the bend of the hat to the end of the brim and your done.
Baby size breakdown
Red Loom: 29 pegs
EW,P,EW8rows, W&T 14 pegs down to 6 pegs, EW 12 rows, D every other DSCOF
Brim: EW 12, W&T 12 pegs down to 6 pegs, put cast on onto pegs COF
Child size
Green Loom: 36 pegs
EW, P, EW10rows, W&T 18 pegs down to 8 pegs, EW 14 rows, D every other DSCOF
Brim: EW 14, W&T 14 pegs down to 8, put cast on onto pegs COF
Adult size
Yellow Loom: 41 pegs
Brim: EW CO 20, W&T 20 pegs down to 10 pegs, then add the wrap in turns back in row by row, put cast on loops back. Hat: EW CO 20,21, or 22 depending on your loom, EW7rows, W&T 20 pegs down to 10 pegs, EW 20 rows, D every other peg, DSCOF.
Blue Loom and Flower Loom
Tan, Shirt color, Pants Color, and Hat Color Yarn
Buttons for eyes, nose, and mouth
Polyfil
Looming Hook
Crochet Hook
Crafters Needle
Hot Glue Gun
Hat and Scarf
Terms:
Cast On: CO
Draw String Cast On: DSCO
E-Wrap: EW
Purl: P
Draw String Cast Off: DSCOF
Cast Off: COF
Head: Circular: Blue Loom or 24 peg loom: Tan
CO 24
Row 1-15: EW
DSCOF
Arms: Circular: Flower Loom or 12 peg loom
CO 12 Shirt yarn
Row 1-10: EW
Change to Tan Color
Row 11-15: EW
DSCOF
Make 2
Legs: Flat: Blue Loom or 24 pegs
CO 18 pegs Tan yarn
Row 1-4: EW
Row 5: D1, EW 15, D1, EW 1
Row 6: D1, EW 13, D1, EW 1
Change to Pants Color
Row 7-17: EW
CO
Sew up, and make 2
Body: Circular: Blue Loom or 24 pegs
DSCO 24 pegs Pants yarn
Row 1-6: EW
Row 7: Purl
Row 8-17: EW
Change to Shirt Color
Row 18-28: EW
CO
Draw string your cast on.
Stuff head, arms, legs, and body. Sew legs on the line your purled right by each other, then sew on head, then sew on arms at the very top of body and line them up on the outside of legs. Hot glue buttons on face. Make hat of your choice and add a scarf if you would like.
Items:
Knifty Knitter Long Looms
Knifty Knitter Divider
Looming Hook
Crafters Needle
2 Skeins of Yarn
Crochet hook
Terms:
EW: E-wrap
CO: Cast On
COF: Cast Off
P: Purl
K: Knit
D: Decrease
Sole: Work Circular
CO 20 pegs
Row 1-3: EW
Shoe Upper: Work Circular
Row 4-5: P
Row 6-7: K
Row 8: K8, *move divder in 1 slot, D 1 k1, k1, D1 K1**, K7
Row 9: K6, *-**, K to finish row
Row10: K4, *-**, K to finish row
Row 11: K2, *-**, K to finish row
Row 12: K (Should be 12 pegs total)
Row 13-14: P
COF
Tighten CO, sew up bottom, weave in loose ends. Make 2
From newborn to adult bootie diagram.
When following the diagram if gives generic pattern to the newborn size base, the decrease section follows the *-**, which I suggest decreasing before you even start the row.
Newborn-3 months Size 1
20 pegs : EW 3rows, P 2rows, K 2rows, K Decrease 2 each row til down to 12pegs, K 1 row, P 2rows.
3-9 months Size 2-2.5
22 pegs: EW 3rows, P 2rows, K 2rows, K Decrease 2 each row til down to 14pegs, K 1row, P 2rows.
9-18 months Size 3-4
24 pegs: EW 4rows, P 3rows, K 2rows, K Decrease 2 each row til down to 14pegs, K 1row, P 3rows.
18-24 months Size 5
26 pegs: EW 4rows, P 3rows, K 2rows, K Decrease 2 each row til down to 16pegs, K 1row, P 3rows.
2-3 years Size 6-7
28 Pegs: EW 5rows, P 4Rows, K 2rows, K Decrease 2 each row til down to 16pegs, K 1row, P 4rows.
Children's Size 8
30 Pegs: EW 5rows, P 4Rows, K 2 rows, K Decrease 2 each row til down to 18pegs, K 1row, P 4rows.
Children's Size 9-10
32 Pegs: EW 6rows, P 5rows, K 2rows, K Decrease 2 each row til down to 18pegs, K 1row, P 5rows.
Children's Size 11
34 pegs: EW 6rows, P 5rows, K 2rows, K Decrease 2 each row til down to 20pegs, K 1row, P 5rows.
Children's Size 12-1
36 pegs: EW 7rows, P 6rows, K 2rows, K Decrease 2 each row til down to 20pegs, K 1row, P 6rows.
Children's Size 2-3
38 pegs: EW 7rows, P 6rows, K 3rows, K Decrease 2 each row til down to 22pegs, K 2rows, P 6rows.
Adult's Size 4-6
40 pegs: EW 8rows, P 7rows, K 3rows, K Decrease 2 each row til down to 22pegs, K 2rows, P 7rows.
Adult's Size 7-9
42 pegs: EW 8rows, P 7rows, K 3 rows, K Decrease 2 each row til down to 24 pegs, K 2rows, P 7rows.
Adult's Size 10-12
44 pegs: EW 9rows, P 8rows, K 3rows, K Decrease 2 each row til down to 24 pegs, K 2rows, P 8rows
Dragon (Intermediate)
Items:
24 peg loom
looming hook
crafters needle
crochet hook
measuring tape
4 colors of yarn: main color, belly color, spine color, and horn color
polyfill
Two plastic washer snap 18 mm eyes, or buttons if you choose
Stitches:
EW: E-wrap
P: Purl
I: Increase
D: Decrease
ID: Internal Decrease
CO: Cast Off
ECO: E-wrap Cast On
Draw String Cast Off
Head: Work Flat
ECO 24 Pegs
Row 1-9: EW
Row 10: EW3,(Work Ear: EW 4 pegs, 3 rows, I1*, EW 4, I1*, EW 6 pegs 2 rows, EW 4 pegs 2 rows, EW 2 pegs 4 rows, EW 4 pegs 2 rows, EW 6 pegs, 2 rows, D1 EW3, D1, EW1, EW 4 pegs 5 rows.)Tie on horn color but do not cut main color. (Work Horn: EW4 pegs 4 rows, EW 2 pegs 5 rows, EW 4 pegs 7 rows.) Go back to main color and EW 6 pegs. Pick up horn color (Work Horn: EW 4 pegs 4 rows, EW 2 pegs 5 rows, EW 4 pegs 7 rows) Tie off and cut horn color, go back to main color EW 4 pegs. (Work Ear: EW 4 pegs 3 rows, I1*, EW 4, I1*, EW 6 pegs 2 rows, EW 4 pegs 2 rows, EW 2 pegs, 4 rows, EW 4 pegs 2 rows, EW 6 pegs 2 rows, D1, EW 3, D1, EW1, EW 4 pegs 5 rows.) EW 3
* Note when increasing do not toss loop already on peg, when increasing you are fattening the look of the ear, if you toss the loop that is already there you are connecting the head to the middle part of the ear.
Row 11-16: EW
Row 17: ID all pegs down to 12 pegs ( Make sure to tighten loops after bringing pegs together, this helps to define the snout area)
Row 18: EW
Row 19: EW4, P4, EW4
Row 20: EW
Row 21: EW4, P4, EW4
Row 22: EW
Row 23: EW2 (Work Nostril: EW 2 pegs 5 rows) P4 (Work Nostril: EW 2 pegs 5 rows) EW 2
Row 24: EW
Row 25: EW4, P4, EW4
Row 26: EW
Draw String CO
Sew up snout, horns, ears, draw string back of head, line eyes up between horns and ears. Stuff
Arms: Work Flat
ECO 16 Pegs
Row 1-4: EW
Row 5: D1, EW 13, D1, EW1
Row 6: D1, EW 11, D1, EW1
Row 7-17: EW
CO
Sew up bottom and front, stuff, make 2.
Back Legs: Work Flat
ECO 24 Pegs
Row 1-6: EW
Row 7: CO4, EW 20
Row 8: CO4, EW 16
Row 9: D1, EW13, D1, EW1
Row 10-16: EW
Row 17: D1, EW11, D1, EW1
Row 18: D1, EW9, D1, EW1
Row 19: D1, EW7, D1, EW1
CO
Sew up front and half of bottom, flip right side out, stuff sew up, pull in loose ends. Make 2.
Back Body: Work Flat
ECO 24 Pegs
Row 1-20: EW
Row21: D1, EW21, D1, EW1*
Row22: D1, EW19, D1, EW1 **
Row23-33: Repeat *-** till down to 2 Pegs
CO
Belly: Work Flat
ECO 12 Pegs
Row 1: EW*
Row 2: Purl**
Row 3-20: Repeat *-**
Row 21-22: Purl
Row 23: EW
Row 24: D1, P9, D1, P1
Row 25: EW
Row 26: Purl
Row 27: D1, EW 7, D1, EW1
Row 28: Purl
Row 29: EW
Row 30: D1, P 5, D1, P1
Row 31: EW
Row 32: Purl
Row 33: D1, EW 3, D1, EW1
Row 34: Purl
Row 35: EW
Row 36: D1, P 1, D1, P1
Row 37: EW
Row 38: P
Row 39: D1, EW, D1, EW
CO
Sew belly and back together, flip right side out and stuff.
Sew head to body by lining up back of head to tail, and front of head to center front of body, then sew on arms at very top of body two columns back from belly color, then sew back legs directly underneath arms lining them right up.
Spine: Work Flat
Measue spine of dragon, then repeat these 10 rows=1 inch
ECO 3 pegs
Row 1: EW3
Row 2: EW1, P1, EW1
Row 3: EW3
Row 4-9: EW1 6x
Row 10: EW
CO
Sew on spine starting from tail to head.
Your done!!!
Ankle Booties Circular Loom
Small Knifty Knitter Circular Loom
Loom Hook
Crochet Hook
Crafters Needle
2 Skeins of a color
2 Skeins of white
Size for 6-9months
Sole of Shoe
Work Circular
E-wrap all pegs for cast on
Row 1-3 : Knit
Row 4: Purl
Row 5-6: Knit
Change color to your color you chose to work the top of the shoe.
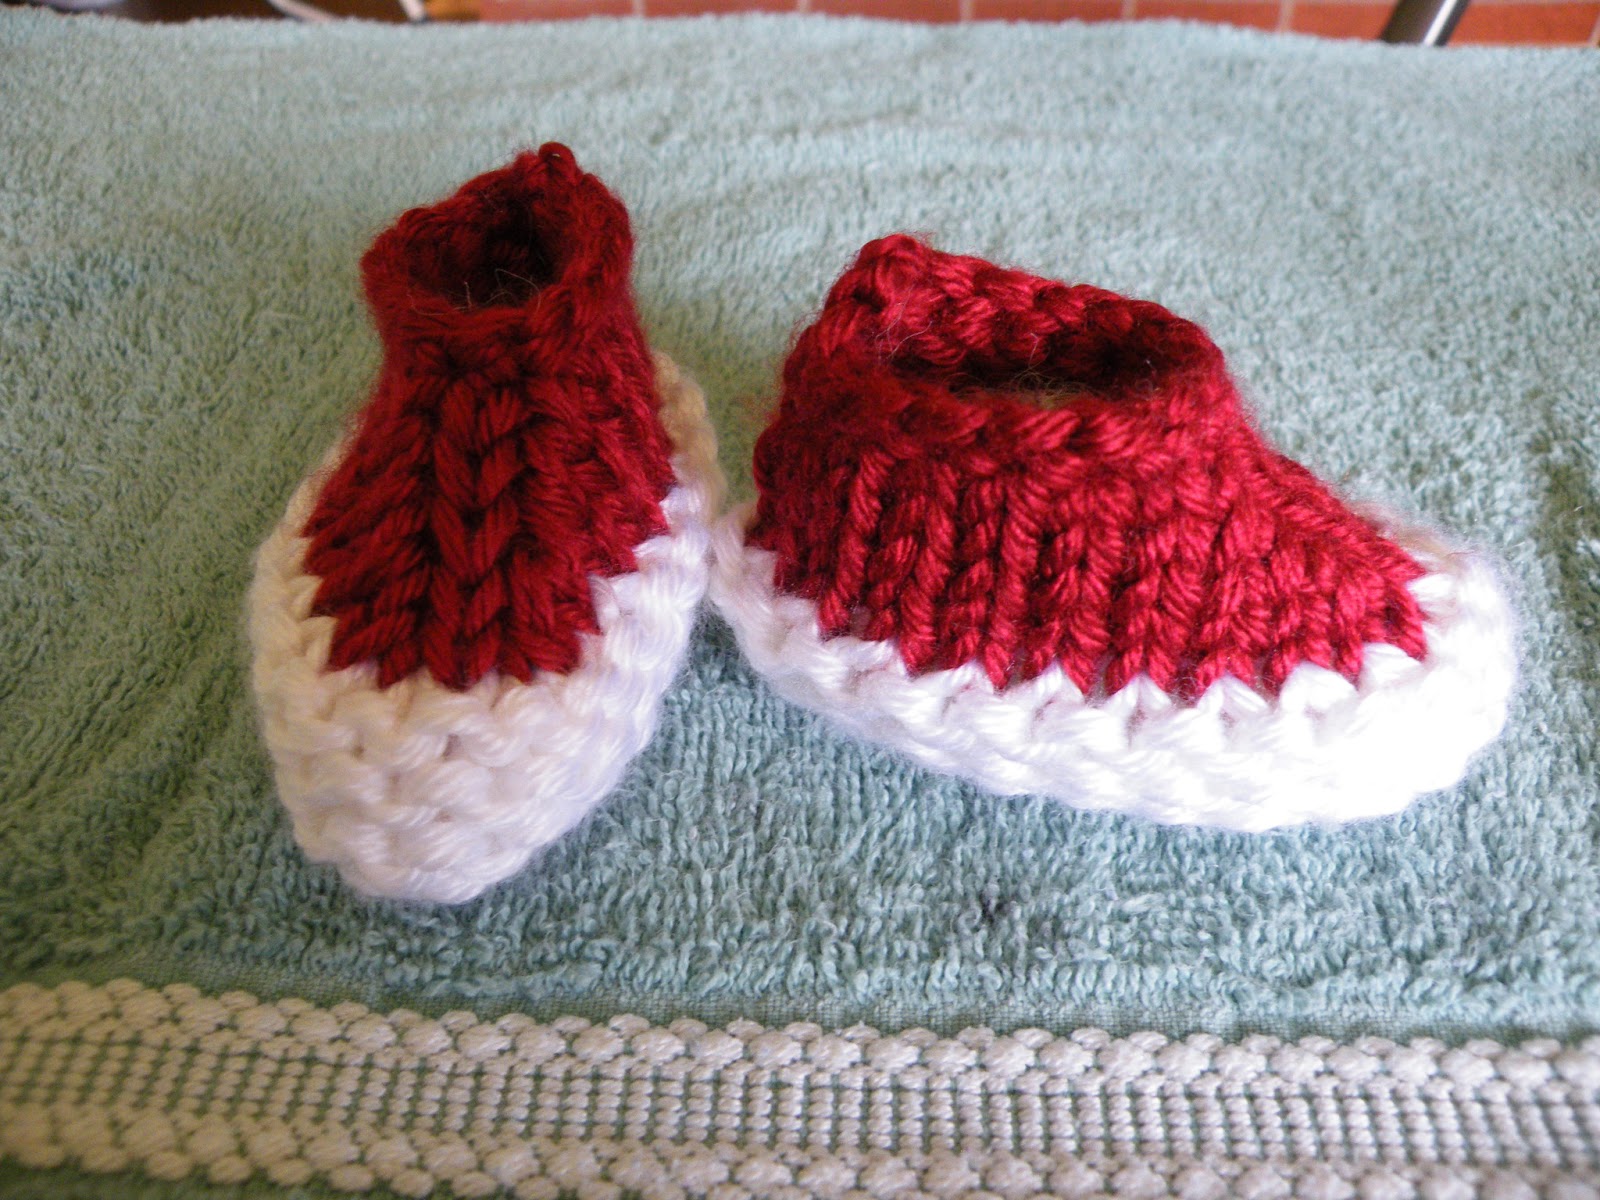
Tennis Shoe Booties Circular Loom
Small Knifty Knitter Circular Loom
Loom Hook
Crochet Hook
Crafters Needle
2 Skeins of a color
2 Skeins of white
Size for 6-9months
Sole of Shoe
Work Circular
E-wrap all pegs for cast on
Row 1-3 : Knit
Row 4: Purl
Row 5-6: Knit
Change color to your color you chose to work the top of the shoe.
Top of the Shoe
Row 7-8: Knit work circular
Start working flat from last peg knit this is your new starting point.
Row 9: Decrease by 1 knit 16 Decrease 1 knit
Row 10: Decrease by 1 knit 14 Decrease 1 knit
Row 11: Decrease by 1 knit 12 Decrease 1 knit
Row 12: Decrease by 1 Knit 10 Decrease 1 Knit
Row 13: Knit
Cast off
Tongue of Shoe
Row 1-8: Knit
Row 9: Decrease by 1 knit 3 decrease 1 knit
Row 10: Knit
Cast off
Weave in your ends, tighten your original cast on of the sole, sew up.
Edge of shoe
Start by crocheting tongue to top of shoe by starting at the sole top. Crochet like you are going to sew the two together then loop bring yarn through then loop bring loop through both, then chain two loops, repeat to top of tongue. Then put an edge to the back of top of the shoe, stick hook through top edge of shoe loop bring through, loop bring through both, continue to other side and then start the beginning again connecting the tongue and top of shoe. Lace up and your done.