The Muse Scarlett Yvette Royal

The Muse Scarlett Yvette Royal

Monday, April 16, 2018

How To Re-Fashion a T-Shirt That is Too Big to Be a Dress For a Little Girl

How to Re-Fashion a T-Shirt for Little Girl To Be a Dress!!!

Before


After


My folks ordered this great t-shirt because it had donkeys on it and my little girl is obsessed with donkeys and well farm animals in general. Problem is they got the smallest size available in kids but it was still too big by a lot. So I sad I would fix it and make a dress. I took a photo by photo process on turning this into a dress and how to do it if you want to do it yourself for your little girl who loves a t-shirt that is too big.

Items you will need:
Oversized Shirt
Button
A package of 3yards of lace if larger than small 2 packages of 3 yards of lace
Needle
Thread that matches color of shirt
Scissors
Package of Bias Binding 1" that is a similar color to shirt
Elastic that is thin
Safety Pins
Pins

If you buy a sewing package half this stuff will probably be included, those packages are great to have for little projects like this. If you have a machine feel free to use it for this as well, I personally am more gifted at hand sewing.

First you will need to cut all the edges off your shirt and the sleeves see image for how sleeves are cut. Keep it very close to the seams on the neckline and bottom of shirt. Stretch the bottom and sleeves out after cutting to make wider. Cut a slight V in the neckline by folding the shirt in half with the front center being your fold. I usually make sure I cut very little off, just want it to meet the curve of the neck with a slight V. Makes for a prettier neckline. You can skip this if desired.


Next you will need to set up your elastic waist band in the back.
Step 1: Turn Shirt inside out and the back facing you, cut your bias binding measuring the length of the back of the shirt right at the bottom of the sleeve hole.

Step 2: Pin the middle in place making sure the front of the shirt does not get involved in the pinning. Then pin the upper section.

Step 3: Sew the top binding down, then the bottom down, then a seam through the middle leaving the ends of the binding open for adding elastic.

Step 4: Cut a single piece of elastic the length of the back, it will be sent through the upper part of the binding then woven to the lower part of the binding your created. Sew together your ends of the elastic. This makes it really easy. Always pin off your starting elastic so it doesn't get lost in the send through. You will need your safety pin for the putting in the elastic. This completes the elastic section. 

Then you will gather a small area at the bottom sides weaving the needle in and out to desired gather up and pull and tie off. Measure to make sure it is same on both sides.


Now to add your lace. I never cut the lace I sew as I go and cut when I finish the edge for as little to no waste as possible. I started with the sleeves. Pin in the lace if you do not trust to free hand sew, also feel free to use a machine if you would like.

Then I sew down the lace around the neck line. At the front I add a button to hide the point  lace connection center front. I would suggest sewing down the bottom edge of the lace, you might want to pin this part down for a smooth sew down.

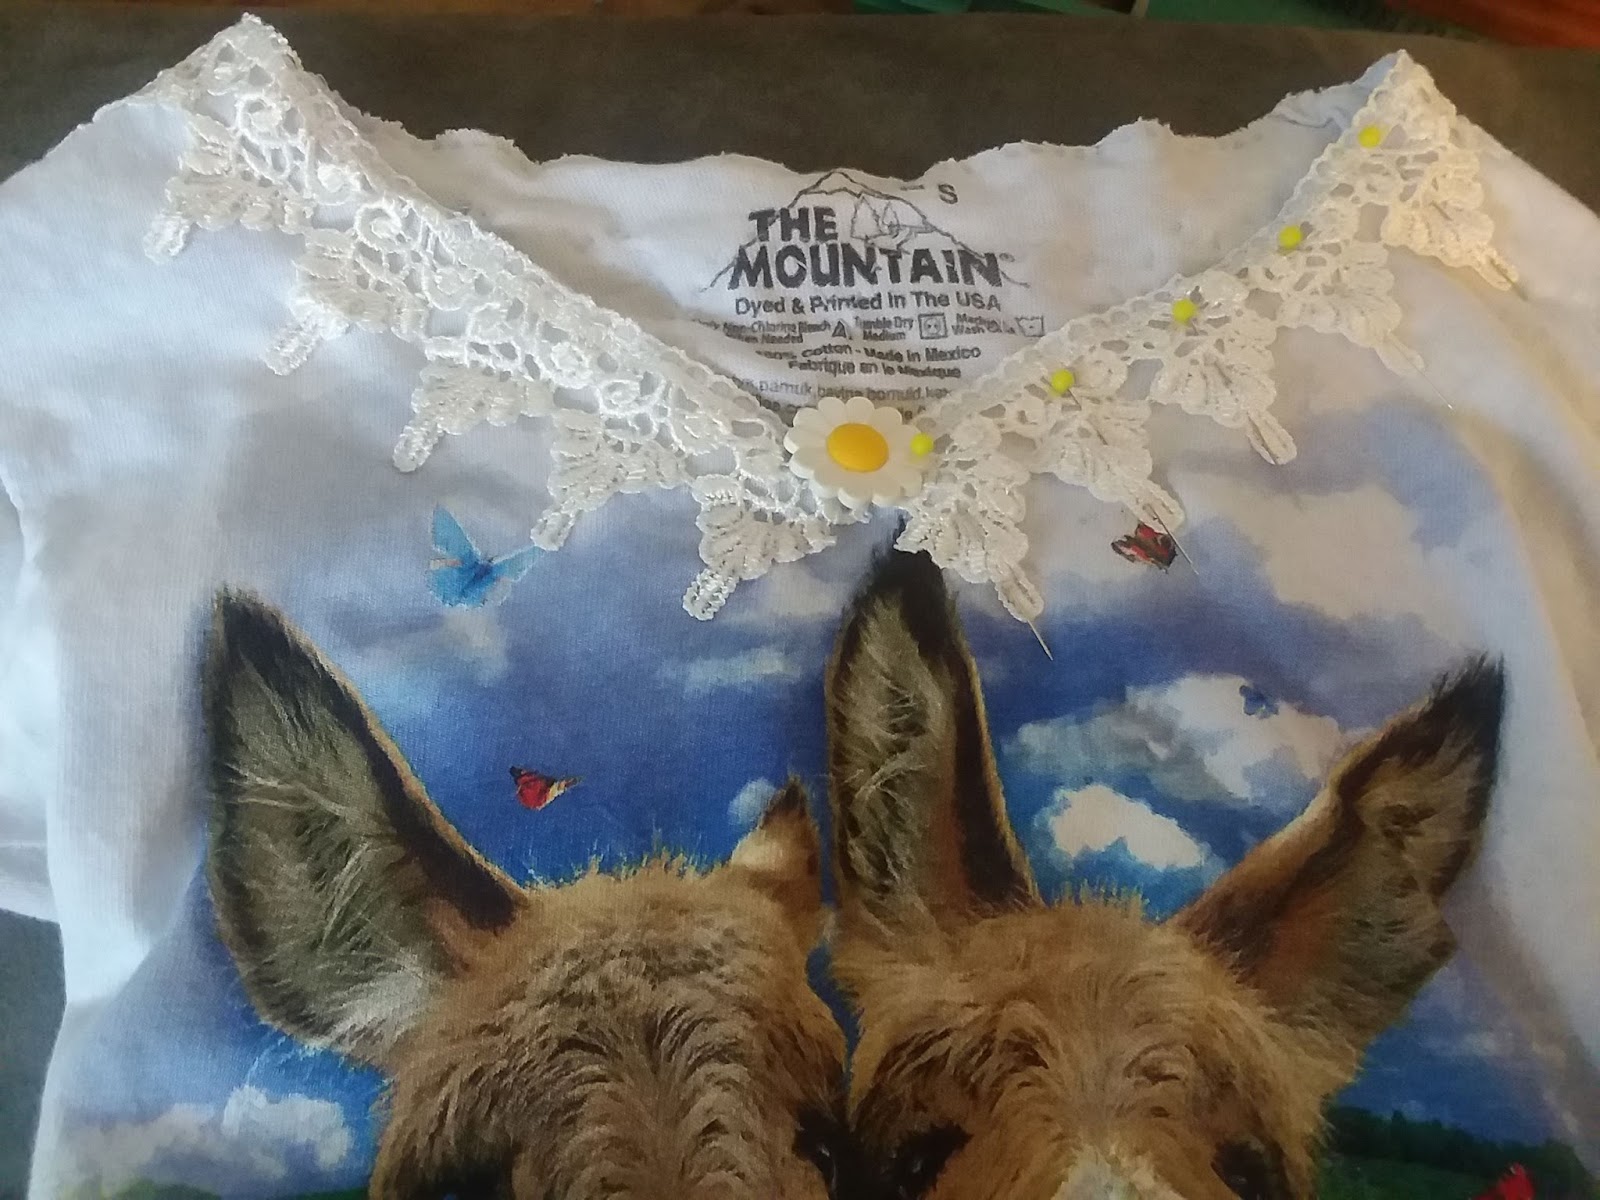
Now sew the lace trim at the bottom of the shirt.

If the neckline is too large, which mine was I add an extra little seam at the top of the lace to allow be to put a small piece of elastic in the back to close the neck line in. You can also hand gather, or pleat the top.

After this your done!!! Yes you can do this for an adult size shirt, you will need more lace for the project very likely.


By solidly hand sewing down the lace with 2 seams and all this should hold up quite nicely in a wash. Hope you enjoyed this tutorial.

Thursday, April 12, 2018

50% off Spring Weather Patterns On Ravelry!!!

It is that time for a Spring Weather Sale of 50% off on Ravelry Patterns in my store!!!


Check out these patterns included in the sale below!!!


Wednesday, April 4, 2018

How to Loom Knit a Teddy Bear Revamped

Loom Knit Teddy Bear Revamped


It has been about 10 years since creating this pattern and 8 years since doing the video, so I decided it was time to redo this pattern because of my experience since then there is a lot of improvements and adjustment. The pattern is still basically the same, but many improvements. There are improvements on what kinds of yarns to use when using certain gauges. How much to stuff, how to create more of a snout area, and much more. This new video is really informative on how to create the most adorable teddy bear. So lets begin. 

24 peg looms
5/8" gauge (KK and Most major brands) Size yarn needs to be 7, or bulked up 6
1/2" gauge needs size 6 yarn
3/8" gauge needs size 5 yarn
1/4" guage needs size 4 yarn
Now depending on the gauge will vary the size of the teddy. The 5/8" is going to give you the largest bear, while 1/4" gauge will give you almost a key chain size teddy. 
The video revamp is done in the 24 peg 1/2" gauge loom with Lions Brand Home Town USA using about 100 yards. 

So lets get some items needed

24 peg loom
yarn equivelant to gauge of loom
looming hook
crafters needle
stitch holder or several markers
polyfil
safety eyes and safety nose

Terms
DSCO: Draw String Cast On: Weave in and out of the pegs, then toss all the loops over as you work the working yarn over the empty pegs.
EW: E-Wrap: Wrap working yarn around the back then to the front and back around the back of the peg. Toss bottom loop over.
K: Flat Knit: Lay working yarn over the peg and toss the bottom loop over.
P: Purl: Bring working yarn through the bottom of the stitch and up through the top, take the original stitch off and place the new one on the loom.
ID: Internal Decrease: The process of lifting the stitches and placing 2 stitches onto the pegs. Then knit all the stitches together. This usually halves the stitch count.
K2tog: Knit 2 Stitches Together: Knit 2 stitches together by tossing both loops over the top working yarn.
BOLB: Bring Original Loops Back: Process of following the bridge of the unworked stitch and pull the bottom notch stitch from the bridge back up onto the pegs.
D: Decrease: Moving a stitch in direction of an arrow.
DSBO: Draw String Bind Off: Sending the tail that was cut through all the stitches and draw string it together.
BO: Bind Off: Process of knit pegs 1 and 2, place stitch 2 on peg 1 and toss the bottom loop over and move stitch over one. Then knit peg 2 and move stitch to peg 1 toss bottom loop over and move stitch over 1, repeat this section over and over until complete.

 Head
DSCO 24 Flat
Row 1: EW
Row 2: K
Row 3-9: Repeat rows 1 and 2
Row 10: K6, (Ear: K4, EW4, K4, EW4, K3, EW2, K3, EW4, K4, EW4, K4 BOLB), K4, (EAR), K6
Row 11: K6, K2tog 4times, K4, K2tog 4times, K6
Row 12: EW
Row 13: K
Row 14-16: Repeat rows 12 and 13
Row 17: ID 24 to 12 stitches
Row 18: K
Row 19: EW
Row 20-23: Repeat rows 18 and 19
DSBO
Close up back of head and use the star method to close off the hole. Then sew up the snout. Cinch eye technique, add safety eyes and nose, then stuff.

Body
DSCO 24 Circular
Row 1: EW
Row 2: K
Row 3-6: Repeat rows 1 and 2 
Row 7: P10, (Tail: K4, EW4, K4, EW4, K3, EW2, K3, EW4, K4, EW4, K4 BOLB), P10
Row 8: K10, K2tog 4times, K10
Row 9: EW
Row 10: K
Row 11-24: Repeat rows 9 and 10
BO
Close up bottom and use star method to close off the hole. Then sew on head lining the back of the head up with the tail. 

Arm
DSCO 14 Flat
Row 1: EW
Row 2: K
Row 3-14: Repeat rows 1 and 2
BO
Make 2
Draw string end and sew up the sides, stuff. Sew onto the top of the body lined up with the ears. 

Legs
DSCO 18 Flat
Row 1: EW
Row 2: K
Row 3-6: Repeat rows 1 and 2
Row 7: D-> K2tog, EW14, D<-K2tog
Row 8: D<- K2tog, K12, D->K2tog
Row 9: EW
Row 10: K
Row 11-19: Repeat rows 9 and 10
BO
Make 2
Drawstring until the bottom is smooth and flat, then sew up, stuff. Then sew onto the body on the purled row, line up with the arms and sew towards the middle of the front of the body.

You're done!!!