Overview: Hard to get, costly shipping as it usually ships from Russian area of the globe. I think it is well worth it and is a great yarn to work it. I enjoyed it soo much I ordered several colors in this yarn for making socks. When you order more the shipping is usually cheaper.
Availability:Online Etsy, Ebay, Amazon less expensive and more accessible than Alize.
Weight Material: Fingering Size 1
Material: 41%Cotton, 39%Wool, 13%Nylon, 7%Elastic
Texture: Little rough but not bad.
Memory:Okay has thin elastic thread.
Overview: Doesn't come in solid colors generally, usually self striped. While it is cheaper and more available in the states it isn't going to hold it's stretch for very long due to the type of elastic thread. I can see it corroding easily and would not suggest drying in the dryer. They wash up okay when put into the wash. Due to the yardage it would take 2 skeins to make a pair of socks. To be honest not a favorite.
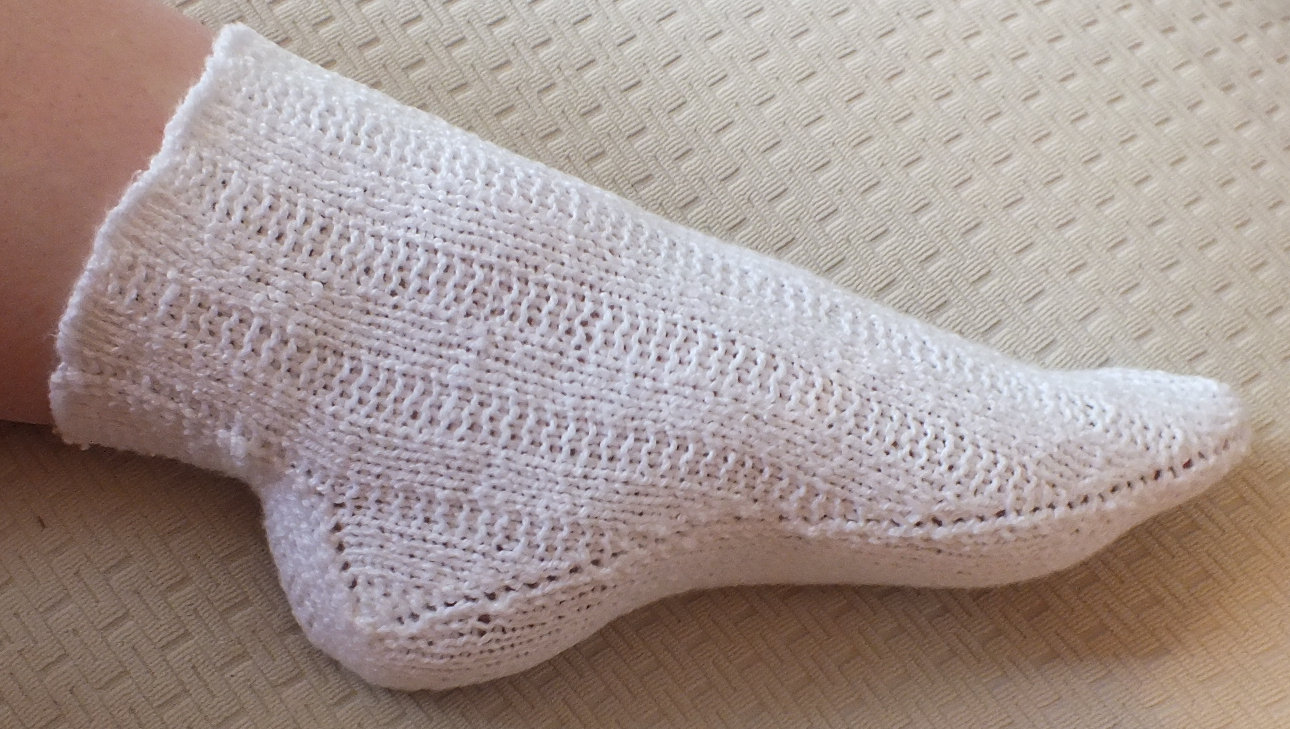
Sock made with the Paton Stretch Sock Yarn along with Video tutorial on how to make it.
Cascade Fixation Yarn Review
Cost: $5 to $6 a skein you will need 2 for a pair of socks.
Yardage: 100yds
Availability: ebay, etsy, amazon
Weight: DK
Material: 98% Cotton, 2% Spandex
Texture: Soft and Stretchy
Memory: Seems great before working with it, then isn't so great after knitting with it.
Overview: Seems springy before working with it, but due to its heavy texturing it doesn't stay as springy after working with it because the stitches don't slide around because of the texture. I find that due to its texture the stitch work doesn't show up as cleanly and so not so much a fan of it. Plus you don't get that much of it in one skein and it is expensive. It also I have been told shrinks a lot after washing it. I haven't tried it yet to know if that is the case with washing. It is very soft though I will give it that. You can get it in faster as you can get it within the US. Oh but you can get solid colors in this yarn that is an option that Paton doesn't have.
So I noticed that Red Heart put out a variety of scrubby yarns, and I figured I would buy them and give them a review. Lets dive into what I found!!
Sparkle
Cost: $3.50 -$4.50
Yardage: 174yd
Availability: Craft Stores
Weight: 4 worsted
Material: Polyester
Water Hold Amount: 1/3cup
Drying Time: 18 hours
Texture: Itchy
Overview: You get a lot of yardage and it is pretty, it also has stretch to it for easier use. I found it itchy and it mostly a yarn I would use for ornaments and decoration rather than use for wash cloths.
Cotton
Cost: $4-$5
Yardage: 121yd
Availability: craft stores
Weight: 4 worsted
Material: cotton
Water Hold Amount: Little more than 1/4cup
Drying Time:(Edit) longer than 24 hours if humid (if dry less than 24 hours)
Texture: moderately rough
Overview: I liked this one best of all, it can work as a wash cloth and it just the right amount exfoliant. It also would work as a dish towel. It has no give, but at least a moderate amount of yardage.
Original
Cost: $3.50-$4
Yardage: 92yds
Availability: anywhere
Weight: 4 worsted
Material: polyester
Water Hold Amount: more than a 1/3 cup
Drying Time: 24 hours
Texture: rough
Overview: I think this one was my least favorite. It has no give so watch your tensioning. It is very rough and it is best for dishes and things you need to well scrub. I was very rough on my hands. I didn't think it came with enough yardage either. They at least come in vibrant colors.
If you would like to get the patterns above check out this new mini book of gift patterns on Ravelry!!!
This mini book will be available on Ravelry, CinDwood, and Amazon in Kindle and Printed Format. Links will be added as they become available. Digital PDF is $7.
This is a fun collection for wonderful gifts for friends and family, and
heck gift for yourself. This collection uses a lot of 10 stitch
techniques when making the wash cloths. The other projects are great
like, the insulator for your summer mug with cold water and keeps it
cold, and a washable loofah that you can open up and dry out. Many of
the patterns have videos to follow with beginning to end, and if not
plenty of video examples that can help you achieve the patterns. I used 2
different looms, the 25 peg 3/8” gauge loom and 60 peg 3/8” gauge loom.
These are great projects for some scrap yarns and srubby yarns. So have
fun and happy looming!!!
How to Re-Fashion a T-Shirt for Little Girl To Be a Dress!!!
Before
After
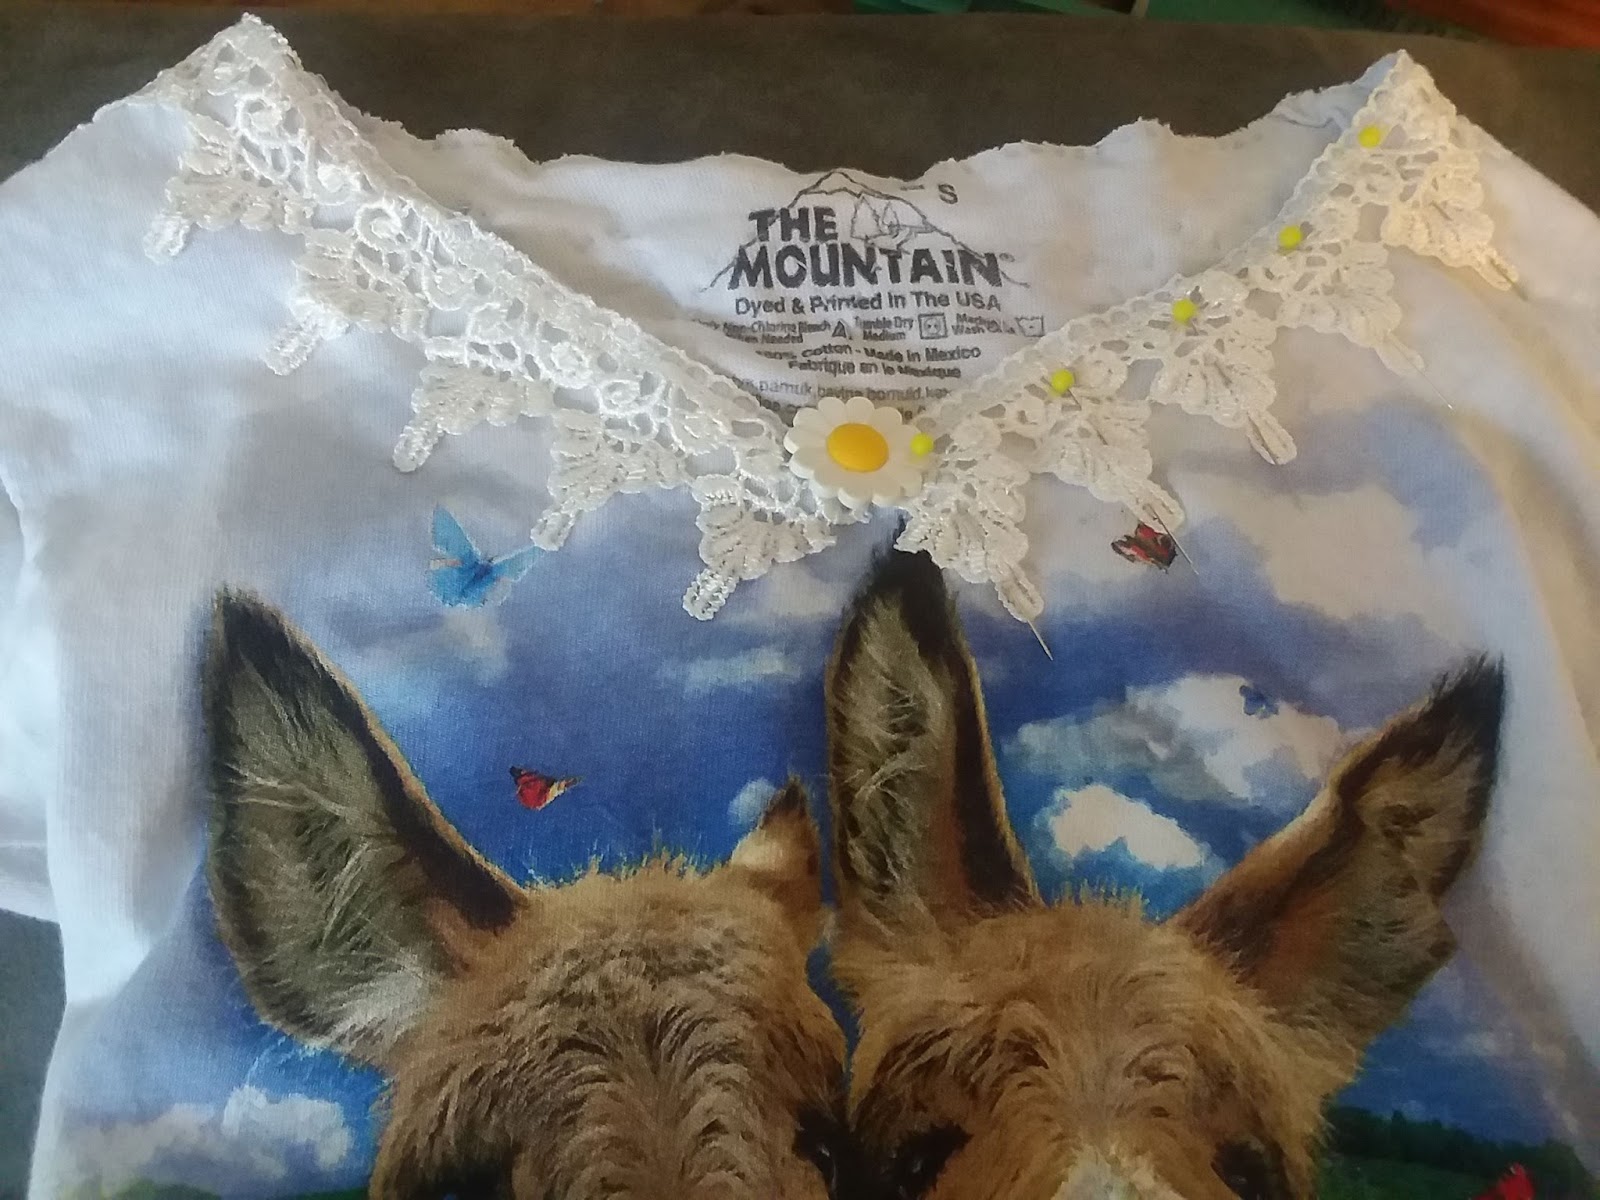
My folks ordered this great t-shirt because it had donkeys on it and my little girl is obsessed with donkeys and well farm animals in general. Problem is they got the smallest size available in kids but it was still too big by a lot. So I sad I would fix it and make a dress. I took a photo by photo process on turning this into a dress and how to do it if you want to do it yourself for your little girl who loves a t-shirt that is too big.
Items you will need:
Oversized Shirt
Button
A package of 3yards of lace if larger than small 2 packages of 3 yards of lace
Needle
Thread that matches color of shirt
Scissors
Package of Bias Binding 1" that is a similar color to shirt
Elastic that is thin
Safety Pins
Pins
If you buy a sewing package half this stuff will probably be included, those packages are great to have for little projects like this. If you have a machine feel free to use it for this as well, I personally am more gifted at hand sewing.
First you will need to cut all the edges off your shirt and the sleeves see image for how sleeves are cut. Keep it very close to the seams on the neckline and bottom of shirt. Stretch the bottom and sleeves out after cutting to make wider. Cut a slight V in the neckline by folding the shirt in half with the front center being your fold. I usually make sure I cut very little off, just want it to meet the curve of the neck with a slight V. Makes for a prettier neckline. You can skip this if desired.
Next you will need to set up your elastic waist band in the back.
Step 1: Turn Shirt inside out and the back facing you, cut your bias binding measuring the length of the back of the shirt right at the bottom of the sleeve hole.
Step 2: Pin the middle in place making sure the front of the shirt does not get involved in the pinning. Then pin the upper section.
Step 3: Sew the top binding down, then the bottom down, then a seam through the middle leaving the ends of the binding open for adding elastic.
Step 4: Cut a single piece of elastic the length of the back, it will be sent through the upper part of the binding then woven to the lower part of the binding your created. Sew together your ends of the elastic. This makes it really easy. Always pin off your starting elastic so it doesn't get lost in the send through. You will need your safety pin for the putting in the elastic. This completes the elastic section.
Then you will gather a small area at the bottom sides weaving the needle in and out to desired gather up and pull and tie off. Measure to make sure it is same on both sides.
Now to add your lace. I never cut the lace I sew as I go and cut when I finish the edge for as little to no waste as possible. I started with the sleeves. Pin in the lace if you do not trust to free hand sew, also feel free to use a machine if you would like.
Then I sew down the lace around the neck line. At the front I add a button to hide the point lace connection center front. I would suggest sewing down the bottom edge of the lace, you might want to pin this part down for a smooth sew down.
Now sew the lace trim at the bottom of the shirt.
If the neckline is too large, which mine was I add an extra little seam at the top of the lace to allow be to put a small piece of elastic in the back to close the neck line in. You can also hand gather, or pleat the top.
After this your done!!! Yes you can do this for an adult size shirt, you will need more lace for the project very likely.
By solidly hand sewing down the lace with 2 seams and all this should hold up quite nicely in a wash. Hope you enjoyed this tutorial.