It is that time of year when you want to make those icy wintery items, and those festive Christmas and Holiday patterns!!!! Here is a list of my popular and also a few new designs to check out to fill in your winter pattern list!!!
To start here are some newer patterns you might like to try!!!
3 strands of worsted scrap yarn or 1 strand bulky scrap yarn
polyfil
pony beads
Terms:
DSCO: Draw String Cast On
EW: W-Wrap
P: Purl
2RCC: 2 Peg Right Cable Cross ( see video for help)
2LCC: 2 Peg Left Cable Cross (see video for help)
2RCCP: 2 Peg Right Cable Cross with a Purl ( Place peg 1 on
holder, EW peg 2 move loop to peg 1, place loop from holder onto peg 2 Purl)
2LCCP: 2 Peg Left Cable Cross with a Purl ( Skip peg 1 Purl
peg 2 place on holder, EW peg 1 then move loop to peg 2, place loop on holder
onto peg 1)
DSCOF: Draw String Cast Off
12 pegs: circular:
DSCO 12 pegs
Row 1: EW12
Row 2-4: P12
Row 5: P1, 2RCC, 2LCC, P2, 2RCC, 2LCC, P1
Row 6-9: P1, EW4, P2, EW4, P1
Row 10: P1, 2LCC, 2RCC, P2, 2RCC, 2LCC, P1
Row 11-13: Repeat row 6
Row 14: P1, 2RCCP, 2LCCP, P2, 2RCCP, 2LCC2, P1
Row 15-17: P12
DSCOF
Before closing the ends, stuff the owl fatter at the bottom
thinner at the top. Close off top and bottom. Hot glue in pony beads for eyes,
and optional beak.
Basic Technique
EW CO 6
EW6
Row1: EW6, EW3 2Row, EW4 2Rows, EW5 2Rows, EW6 (Repeat this technique)
If you want to enlarge it make sure to start the pattern at half the amount of pegs and work way back to the beginning. Also feel free to Purl or Knit the rows as well as EW. If you don't want it to curl Purl the next to the last peg on the outer spiral. If you EW double up your yarn.
Supplies:
12 peg loom
looming hook
crochet hook sizeF
crafters needle
polyfil
3 colors of scrap yarn
2 very small eyes
Terms:
DSCO- Draw String Cast On
K- Knit
P- Purl
ID- Internal Decrease
D- Decrease
COF- Cast Off
DSCOF- Draw String Cast Off
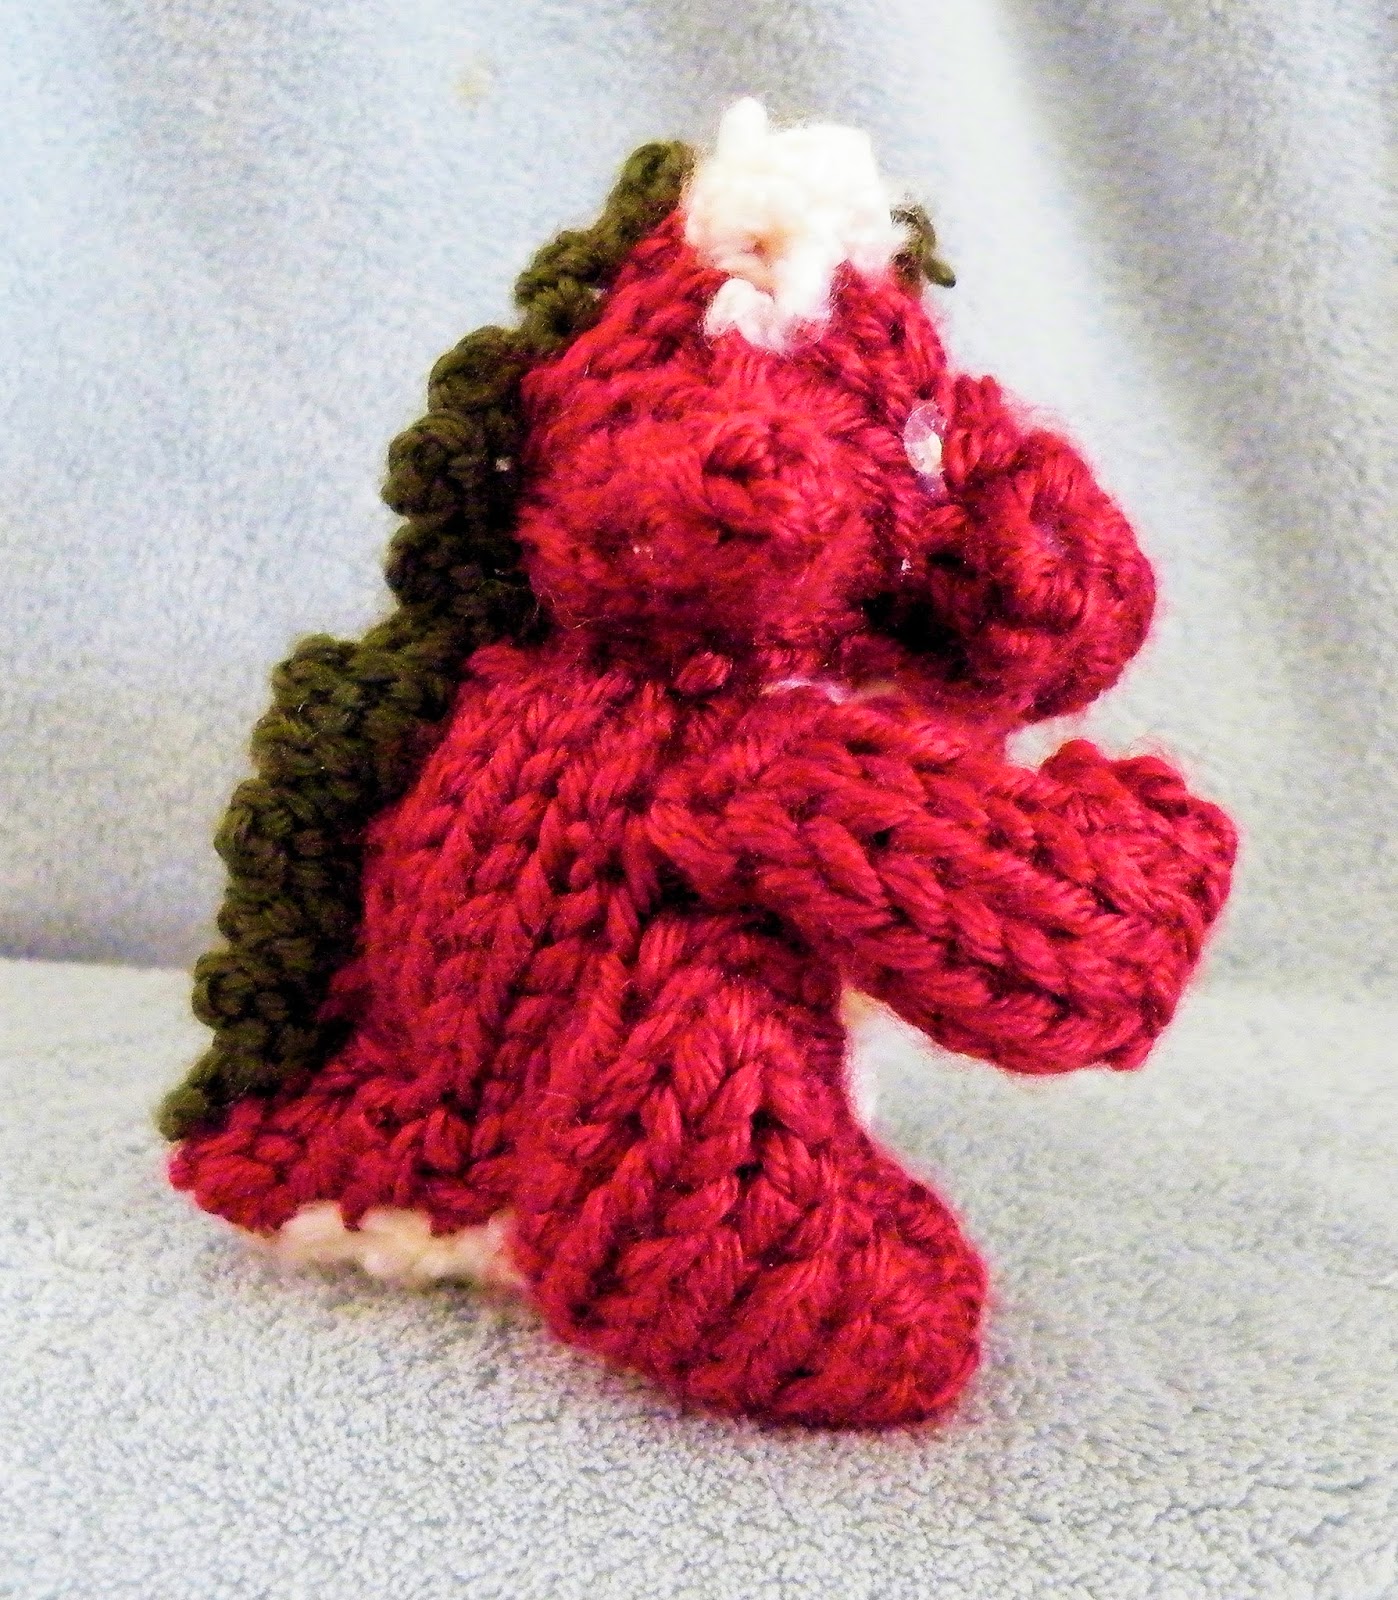
Head: Flat: Main Color: 12 Peg Loom
DSCO 12 pegs
Row 1-5: K12
Row 6: K2 (Ear K2pegs 11rows) (Horn: Change to horn color: K2pegs 11rows) (Horn2 repeat just like horn one) (Ear change back to main color and repeat like you did for first ear) K2
Row 7-9: K12
Row 10: ID 12 to 6 pegs
Row 11: K2, P2, K2
Row 12: K6
Row 13: K1, K1peg 3rows, P2, K1peg 3rows, K1
Row 14-15: K6
DSCOF
Sew up snout, ears, horn, and close up back of head, and stuff.
Back of body: Main Color: Flat: 10 Pegs
DSCO 10 pegs
Row 1-10: K10
Row 11: K1, D1 K1, D1 K1, D1 K1, D1 K1, K1 (6) Bring loops together and tighten loops.
Row 12: K6
Row 13: D1 K1, K2, D1 K1 (4)
Row 14: K4
Row 15: D1 K1, D1 K1 (2)
Row 16: K2
Row 17: D1 K1
Snipe end pull through, sew belly and back together, then stuff. Sew head on lining back of the head up with the tail.
Legs: Main Color: Flat: 10 pegs
DSCO 10 pegs
Row 1-3: K10
Row 4: D1 K1, K6, D1 K1 (8)
Row 5-9: K8
COF
Make 2, sew up bottom and front, stuff, and sew on body lining up with ears at very top of body.
Back legs: Main Color: Flat: 12 pegs
DSCO 12 pegs
Row 1-3: K12
Row 4: COF 2, K10
Row 5: COF 2, K8
Row 6: D1 K1, K4, D1 K1 (6)
Row 7-10: K6
Row 11: D1 K1, K2, D1 K1 (4)
COF
Make 2, sew up front and half of bottom, stuff, then finish sewing up. Sew right under legs, lined up with ears.
Spine: Crochet Hook size F
Slip knot
Chain 25
Chain 4, count back 4 spaces and slip stitch, slip stitch next space.
Repeat this Chain 4 run all the way to the end.
Snip end pull through loop tighten. Sew spine start at the head just in front of the horns and sew down the middle back of the head and down the back of the body. Sew on or hot glue your eyes onto your dragon at the base of the snout lined up with the space between the horn and the ear.
Your done!!!
Note: I did double up my yarn to make it thicker for stuffing. Also if you are having a hard time seeing how to do the legs, please visit the mini dog video to watch how to make the legs. You can also follow the mini dog pattern video as for as the back of the head, after the ears, the internal decrease for help as well. This video is come of my last footage on the old action cam for looming videos. After this should be easy to see videos.
Supplies:
12 peg loom
looming hook
crafters needle
crochet hook
scrap yarn (I do double strand my yarn for this project)
polyfil
2 eyes
Terms:
EW- E-Wrap
K-Knit
P-Purl
D-Decrease
CO- Cast On
DSCO- Draw String Cast On
COF- Cast Off
DSCOF- Draw String Cast Off
ID- Internal Decrease
Head: Flat: 12 pegs
DSCO or EW CO 12 pegs
Row 1-5: K12
Row 6: K3 (Start Ear: K3 peg 21 rows) Repeat ear on next 3 pegs, K3
Row 7-9: K12
Row 10: ID from 12 to 6 pegs
Row 11-16: K6
DSCOF
Sew up snout, ear, and back of head. Stuff.
Body: Circular: 12 pegs
DSCO or EW CO 12 pegs
Row 1-10: K12
Row 11: P12
Row 12-14: K12
DSCOF
Close up bottom and stuff. Sew head on body.
Fron Legs: Flat: 10 Pegs
DSCO or EW CO 10 pegs
Row 1-3: K10
Row 4: D1, K1, K6, D1, K1 (8 pegs)
Row 5-11: K8
COF
Sew up bottom and front, stuff, make 2. Sew right under snout at the top of the body. Make sure the space between the legs lines up with the snout.
Back Legs: Flat: 12 Pegs
DSCO or EW CO 12 pegs
Row 1-4: K12
Row 5: COF2, K10
Row 6: COF2, K8
Row 7: D1, K1, K4, D1, K1
Row 8-10: K6
Row 11: D1, K1, K2, D1, K1
COF
Sew up leaving half the bottom open, stuff, the finish sewing up. Make two. Sew on the sides of the body lined up with ears.
Tail: Flat: 3 pegs
DSCO or EW CO 3 pegs
Row 1-10: K3
COF or DSCOF
Sew on center back of boy on purled row.
Hot glue or sew on your eyes at the base of snout lined up with the inner ears.
This one to show double e-wrap, and tail and hair technique
This shows basic technique, as well as internal decrease.
Options for adding eyes, and how to make them.
Loom Knitting Horse, or My Little Pony
Supplies:
24 and 12 peg loom
Looming Hook
Crafters Needle
Crochet Hook
Polyfil
Yarn (strands doubled)
Eyes
Terms:
DEW: Double E-Wrap (this is a technique to assist in making the knit tighter for firmer stuffing, you EW your pegs 3 times to start, then toss bottom loop over top 2 loops keeping 2 loops on the peg) Please check out my Eeyore video to view this technique.
EW: E-Wrap
ID- Internal Decrease
CO: Cast On
DSCO: Draw String Cast On
COF: Cast Off
DSCOF: Draw String Cast Off
Head: Flat: 24 Peg
DSCO 18 pegs
Row 1-3: DEW18
Row 4: DEW4 (Ear: DEW4 pegs 4 rows, DEW2 pegs 3rows, DEW4 pegs 4rows) DEW2, Repeat ear section, DEW4
Row 5-10: DEW18
Row 11: EW18 (note throw both bottom loops over top loop to leave 1 loop on the peg, this is to prep for the ID.)
Row 12: ID from 18 to 9 pegs
Row 13-17: DEW9
Row 18: EW9 (repeating the same thing as row 11 to prepare for COF)
DSCOF
Sew up snout, ears, and close back of head. Stuff
Neck: Circular: 12 Peg
EW CO 12 pegs
Row 1-4: DEW12
Row 5: EW12 (Toss bottom 2 loops over top to leave 1 loop remaining.)
COF
Tighten cast on, sew head on from your cast of side. Stuff.
Body: Circular: 12 Peg
DSCO 12 pegs
Row 1-9: DEW12
Row 10: EW12 (Toss Bottom 2 loops over top loop leaving 1 loop)
DSCOF
Close up one end, then before closing up other end stuff then close it up. Start by sewing the bottom of the neck to the closed hole of the body and work your way around. You should create a nice angle for the neck and head sitting on the body.
Legs: Flat: 12 Peg
DSCO 10 pegs
Row 1-12: DEW10
Row 13: EW10 ( again toss bottom 2 loops over top to to leave 1 loop for cast off)
COF
Close up bottom and stuff. Make 4. Sew on all for legs 1 right in front of the other on the belly leaving 1 column space between the left legs and right legs on the belly.
To View Hair technique also view Eeyore video for what I am doing for the tail and mane, for visual help.
Tail: Flat: 24 Peg
EW CO 18 pegs
Row 1: EW18
Row 2: EW2 23rows 9times
Pull cast on loops back onto the pegs
Row 3: EW18
DSCOF
Sew on tail at back end area. Trick pull on your loops to make them longer.
Mane: Flat: 12 Peg
EW CO 12 pegs
Row 1: EW12
Row 2: EW2 17rows 6times
Pull cast on loops back onto the pegs
Row 3: EW12
COF
Sew on mane starting and inch infront of the ears and on down the spine area.
For eyes you can add my crocheted eyes and instead of glueing plain black pony beads take your color buttons with black pony beads and glue them to the fatter end. Crochet black around your edge if desired to create the My Little Pony eyes. For Horse use whatever you like.
Supplies:
12 Peg Loom
Looming Hook
Crafters Needle
Crochet Hook
Scrap Yarn
Polyfil
I Double up on my yarn to allow firmer stuffing.
And eyes
Terms:
EW- E-Wrap
K- Knit
P- Purl
CO- Cast On
DSCO- Draw String Cast On
D- Decrease
COF- Cast Off
DSCOF- Draw String Cast Off
Head: Flat: 12 pegs
EW CO or DSCO 12 pegs
Row 1-5: K12
Row 6: K2 (Ear: K3 pegs 11 rows) K2, repeat ear section for next 3 pegs, K2 (note for larger ears, K1 (Ear: K4 pegs 15 rows) K2, repeat ear section for next 4 pegs, K1.)
Row 7-9: K12
Row 10: D1 K1, D1 K1, K4, D1 K1, D1 K1 (8 loops)
Row 11-12: K8
Row 13: D1 K1, K4, D1 K1 (6 loops)
Row 14-16: K6
Row 17: D1 K1, K2, D1 K1 (4 loops)
Row 18-19: K4
Row 20: D1 K1, D1 K1 (2 loops)
Row 21-22: K2
Row 23: D1 K1 (1 loop)
Cut end pull tail through. Sew up trunk, ears, and close up back of head. Stuff.
Body: Circular: 12 Pegs
EW CO or DSCO 12 pegs
Row 1-10: K12
Row 11: P12
Row 12-14: K12
DSCOF
Close up bottom, tighten cast on or draw string to a point that you can stuff your body.
Legs: Flat: 10 Pegs
EW CO or DSCO 10 pegs
Row 1-4: K10
Row 5: D1 K1, K6, D1 K1 (8 loops)
Row 6-11: K8
COF
Tighten cast on, or drawstring cast on to a point to make flat and rows close together. Sew up bottom and front. Stuff. Make 4
Assembly
Sew on head first. Head will help you get alignment to sew on legs to body. Following the line of the ears sew you upper legs at the top of the body lined up with your ears. Sewing on the bottom legs line the outer edge of you bottom legs with the upper legs. Sew bottom legs along the purled row. Hot glue or sew on eyes and your done.
Items:
Scrap Yarn will need to double it.
Flower Loom 12 pegs
29 peg loom or 30
Looming Hook
Crafters Needle
Crochet Hook
Terms:
CO: Cast On
EW: E-Wrap
D: Decrease
YO: Yarn Over
COF: Cast Off
Rose: Work Flat:
EW CO 28 pegs
Row 1: EW 28
Start working petals:
Petal 1 is working pegs 1-4
Row 1-2: EW4
Row 3: EW3
Row 4: EW2
Row 5: EW3
Row 6-7: EW4
For petal 2 work the next 4 pegs the same way. Do this until you are down to the last 2 pegs on the end then just EW2. Then D by 1 to have a total of 27 pegs.
Then take your cast on loops and place them on the pegs.
EW 28
Then COF
Start by wrapping one end and wrap till you get to the other end. You should see the rose now. Sew the bottom together and there is your rose. You can do this on a larger loom just EW CO, then EW a row and repeat the petal concept of 4 pegs across the larger loom.
Leaf: Flower Loom: Work Flat
EW CO 7 pegs
Row 1: Knit 7
Row 2: K2, D1, Skip1, D1, K2
Row 3: K2, YO, K1, Yo
Row 4-5: K7
Row 6: Repeat row 2
Row 7: Repeat row 3
Row 8: K7
Row 9: D1, K4, D1, K1
Row 10: K5
Row 11: D1, K2, D1, K1
Row 12: K3
Row 13: Decrease down to 1 K1
Row 14: K1
Snip end pull through, tighten cast on and add to your rose, you can choose to make more than one. To make a bigger leaf, add 2 to the 7 pegs, then do the decrease part 3 times instead of 2. Every time you add 2 pegs to the 7 add another row of decrease.
For how to loom a regular size rabbit check out my DVD to purchase how you make one.
Mini Rabbit
Items Needed:
12 Peg Loom
Looming Hook
Crafters Needle
Crochet Hook
Scrap Yarn
Polyfil
2 Rhinestones for eyes
Terms:
DSCO: Draw String Cast On
EW: E-Wrap
CO: Cast On
K: Knit
P: Purl
D: Decrease
ID: Internal Decrease
COF: Cast Off
DSCOF: Draw String Cast Off
Head: Flat
DSCO 12 pegs
Row 1-5: K12
Row 6: K3, (work ear K3 pegs 13 rows) (work other ear K3 pegs 13 rows) K3
Row 7-9: K12
Row 10: ID 12-6 pegs
Row 11-13: K6
DSCOF
Sew up snout, back of head, and ears. Stuff
Body: Circular
DSCO 12 Pegs
Row 1-10: K12
Row 11: P12
Row 12-13: K12
D by every other peg and tossing bottom loop over.
DSCOF
Close up bottom and stuff.
Arms: Flat
DSCO 6 pegs
Row 1-6: K6
DSCOF
Sew up side, make 2, stuff.
Back Legs: Flat
DSCO 12 pegs
Row 1-3: K12
Row 4: CO2, K10
Row 5: CO2, K8
Row 6: D1, K5, D1, K1 (6pegs)
Row 7-9: K6
Row 10: D1, K3, D1, K1 (4pegs)
Row 11: K4
CO
Sew up front, half of bottom, stuff then sew up rest of bottom. Make 2.
Sew back legs on the bottom sides of the body, then sew on the arms at the top of the body just in front of the back legs, the sew on the head lining up ears with back legs, nose to front center. Tuck your ends and hot glue on your eyes lined up with inner ear at the base of the snout. If you would like a tail get you a package of the white fluff balls in the crafts department and glue it on for a tail. Your done.
Terms:
DSCO- Draw String Cast On
CO-Cast On
EW- E-Wrap
K-Knit
P-Purl
ID: Internal Decrease
COF-Cast Off
DSCOF-Draw Sting Cast Off
Head: Working Flat
DSCO 12 pegs
Row1-5: K
Row6: Knit 3, work ear ( K2 pegs, 5 rows) K 1, work other ear (K2 pegs, 5 rows) K3
Row7-9: K
Row 10: ID 12 to 6 pegs
Row 11-13: K
DSCOF
Sew up snout, ears, and close up back of head. Stuff
Body: Working Circular
DSCO 12 pegs
Row 1-10: K
Row 11: P
Row 12-13: K
Row 14: Decrease by every other peg
DSCOF
Close up bottom and stuff
Arms: Working Flat
EW CO 6 pegs (you can DSCO if you don't feel comfortable tightening CO)
Row 1-5: K
DSCOF
Close sew up side, tighten CO. Stuff
Make 2
Legs: Working Flat
EW CO 10 pegs ( Again you can do the same as you did the arm)
Row1-2: K
Row 3: D1, K7, D1, K1
Row 4: D1, K3, D1, K1
Row 5-9: K
COF
Sew up bottom and front. Tighten Cast On. Stuff
Make 2
Sew legs along the purled line, then sew the arms on at the very top of the body lined up with the outer edge of the legs. Sew on the head to line up ears with the arms. Hot glue on eyes.