The Muse Scarlett Yvette Royal

The Muse Scarlett Yvette Royal
Showing posts with label loom knitting. Show all posts

Wednesday, April 4, 2018

How to Loom Knit a Teddy Bear Revamped

Loom Knit Teddy Bear Revamped


It has been about 10 years since creating this pattern and 8 years since doing the video, so I decided it was time to redo this pattern because of my experience since then there is a lot of improvements and adjustment. The pattern is still basically the same, but many improvements. There are improvements on what kinds of yarns to use when using certain gauges. How much to stuff, how to create more of a snout area, and much more. This new video is really informative on how to create the most adorable teddy bear. So lets begin. 

24 peg looms
5/8" gauge (KK and Most major brands) Size yarn needs to be 7, or bulked up 6
1/2" gauge needs size 6 yarn
3/8" gauge needs size 5 yarn
1/4" guage needs size 4 yarn
Now depending on the gauge will vary the size of the teddy. The 5/8" is going to give you the largest bear, while 1/4" gauge will give you almost a key chain size teddy. 
The video revamp is done in the 24 peg 1/2" gauge loom with Lions Brand Home Town USA using about 100 yards. 

So lets get some items needed

24 peg loom
yarn equivelant to gauge of loom
looming hook
crafters needle
stitch holder or several markers
polyfil
safety eyes and safety nose

Terms
DSCO: Draw String Cast On: Weave in and out of the pegs, then toss all the loops over as you work the working yarn over the empty pegs.
EW: E-Wrap: Wrap working yarn around the back then to the front and back around the back of the peg. Toss bottom loop over.
K: Flat Knit: Lay working yarn over the peg and toss the bottom loop over.
P: Purl: Bring working yarn through the bottom of the stitch and up through the top, take the original stitch off and place the new one on the loom.
ID: Internal Decrease: The process of lifting the stitches and placing 2 stitches onto the pegs. Then knit all the stitches together. This usually halves the stitch count.
K2tog: Knit 2 Stitches Together: Knit 2 stitches together by tossing both loops over the top working yarn.
BOLB: Bring Original Loops Back: Process of following the bridge of the unworked stitch and pull the bottom notch stitch from the bridge back up onto the pegs.
D: Decrease: Moving a stitch in direction of an arrow.
DSBO: Draw String Bind Off: Sending the tail that was cut through all the stitches and draw string it together.
BO: Bind Off: Process of knit pegs 1 and 2, place stitch 2 on peg 1 and toss the bottom loop over and move stitch over one. Then knit peg 2 and move stitch to peg 1 toss bottom loop over and move stitch over 1, repeat this section over and over until complete.

 Head
DSCO 24 Flat
Row 1: EW
Row 2: K
Row 3-9: Repeat rows 1 and 2
Row 10: K6, (Ear: K4, EW4, K4, EW4, K3, EW2, K3, EW4, K4, EW4, K4 BOLB), K4, (EAR), K6
Row 11: K6, K2tog 4times, K4, K2tog 4times, K6
Row 12: EW
Row 13: K
Row 14-16: Repeat rows 12 and 13
Row 17: ID 24 to 12 stitches
Row 18: K
Row 19: EW
Row 20-23: Repeat rows 18 and 19
DSBO
Close up back of head and use the star method to close off the hole. Then sew up the snout. Cinch eye technique, add safety eyes and nose, then stuff.

Body
DSCO 24 Circular
Row 1: EW
Row 2: K
Row 3-6: Repeat rows 1 and 2 
Row 7: P10, (Tail: K4, EW4, K4, EW4, K3, EW2, K3, EW4, K4, EW4, K4 BOLB), P10
Row 8: K10, K2tog 4times, K10
Row 9: EW
Row 10: K
Row 11-24: Repeat rows 9 and 10
BO
Close up bottom and use star method to close off the hole. Then sew on head lining the back of the head up with the tail. 

Arm
DSCO 14 Flat
Row 1: EW
Row 2: K
Row 3-14: Repeat rows 1 and 2
BO
Make 2
Draw string end and sew up the sides, stuff. Sew onto the top of the body lined up with the ears. 

Legs
DSCO 18 Flat
Row 1: EW
Row 2: K
Row 3-6: Repeat rows 1 and 2
Row 7: D-> K2tog, EW14, D<-K2tog
Row 8: D<- K2tog, K12, D->K2tog
Row 9: EW
Row 10: K
Row 11-19: Repeat rows 9 and 10
BO
Make 2
Drawstring until the bottom is smooth and flat, then sew up, stuff. Then sew onto the body on the purled row, line up with the arms and sew towards the middle of the front of the body.

You're done!!!


Saturday, January 20, 2018

How to Loom Knit Lace Ruffle Trim

Loom Knit 

Lace Ruffle Trim

by

The Loom Muse

 All you need is 10 pegs to do this.

Great for using up scrap yarn as well.

Add in as you go, sew in, or start from the beginning as your cast on. 

Very Versatile. 


Terms

CH CO: Chain Cast On or Crochet Cast On

K: Knit

P: Purl

D: Decrease

YO: Yarn Over

K2tog: Knit 2 Stitches Together

P2tog: Purl 2 Stitches Together

SL: Slip

BO: Bind Off

Follow video for visual help. 


CH CO 10 pegs
Row 1: K
Row 2: P9, K1
Row 3: SL1, K1, D<- YO K2tog, K2, D<- YO K2tog, K1, EWCH 5
Row 4: SL1, P2, WT, K3, SL1, P1, WT, K2, SL1, WT, K1, SL1, P2tog 3times, P5, K1
Row 5: SL1, K3, D<-YO K2tog, K3, EWCH 5
Row 6: SL1, P2, WT, K3, SL1, P1, WT, K2, SL1, WT, K1, SL1, P2tog 3times, P5, K1
Repeat rows 3-6 over and over as long as you need to.
BO

Try adding it to the loom as stitches in this example. 
 

Sunday, July 16, 2017

10 or 8 Stitch Star Blanket/ Vest

10 Stitch Star Blanket Fun

or 8 Stitch Start Vest


So I decided to play with some shaping of the 10 stitch and figure out the the star shape. Then thought why not figure out some stitch patterning like lace, then why not try adding some ruffle yarn to the last round. 

So if you would like to get an idea of what you think of the star shape here is the video link. 

Also if you want the written here is the link for the 

10 Stitch Start Blanket 


The process for the other was an effort to put together, but it was well worth it for the final results turned out eye popping!!!


Tuesday, May 2, 2017

May Tutorial of the Month Loom Knit Lace Bracelet

Loom Knit Lace Bracelet

 Fun fast pattern you can complete with scrap yarn and do on almost any loom!! Room to make even more creative and fancy!!! 

Items:
8 peg loom
looming hook
scrap yarn
fun add ons!!!

Terms:
EW CO: E-Wrap Cast On
EWCH: E-Wrap Chain
K: Knit
P: Purl
D: Decrease
K2tog: Knit 2 Together
BOLB: Bring Original Loop Back
YO: Yarn Over
BO: Bind Off

EWCO 8 pegs
Row 1: K
Row 2: EWCH5, D<- K2tog YO, EWCH10 D-> BOLB K2tog, D->YO K2tog, EWCH5
Row 3: K2, P1, K2, P1, K2
Row 4: K
Row 5: K4, P1, K3
Repeat rows 2-5 over and over till desired length. To figure up length weave your chain up a few and measure out how many chains make an inch, then multiply the number of chains by the number of inches.  I used a 3/8" gauge loom with worsted yarn and did 18 chains for my wrist. 
BO
Sew ends together, or add a pretty button!!


Thursday, April 27, 2017

April Tip of the Month Reading Pictures

Reading Pictures?

Yup how to identify stitches and combos from an image. This will get you started, the trick is to be able to recognize what stitches and combos look like to a point you can make he pattern in your head. This is a great technique for wanting to make needle knit patterns on the loom but don't want the hassle of literally translating the pattern from needle to loom. So lets get started.


This is a pattern above I have never published. It is an Easter Baby Cloche. So lets break down some elements in the photo.

The circle on the lower left is a knit, the upper right is a purl. To figure out stitches count the similar knits or purls beside. To figure the rows count the knits and purls above and below.

This is a cable. If you see stitches crossing each other this is what a cable looks like. For instance you see 3 knit stitches crossing, it is an even cable which means it uses 6 stitches. The cable is crossing towards the right which makes it a right cable cross. This is also a rabbit cable motif, so look for references on these elements.

This is an eyelet, this means you have a combo of decreases, yarn overs, and knitting 2 stitches together. There are a multitude of ways to do this combo and it takes research to know what the combos look like to recreate the particular eyelet look.
This show a 2 piece section here. See how the seed stitch is going a different direction from the garter stitch. This means you either did the brim separate and was sewn on, or worked into the hat part after it was completed.

This is come basic visual, but to get more fluent at this, constantly research, research, research, this gets you more knowledgable about what things look like. This skill is also beneficial taking elements from say one picture and add to elements of another picture to create a completely new pattern. This is what I use often. This is a great skill to have as a designer. So take this start if you are interested to gain your skill in making your own creations through elements you like from an image. Have fun.


Monday, April 17, 2017

April Stitch Pattern of the Month Raspberry Rib Stitch

Raspberry Rib Stitch

A simple knit and purl stitch pattern, that the hardest part if figuring what loom might work for a hat for this pattern. As it uses 8 stitches and 12 rows for a single pattern. Below I will show the chart to guide by when working this pattern as well as how it is written for working flat and in the round. The video that is included shows working flat as there is more to keep up with than in the round. 


Flat
Row 1: K3, P1
Row 2: P1, K3
Row 3: K3, P2, K1, P2
Row 4: P1, K1, P1, K1, P1, K3
Row 5: K3, P2, K1, P1
Row 6: P1, K1, P1 K1, P1, K3
Row 7: K3, P1
Row 8: P1, K3
Row 9: P1, K1, P2, K3, P1
Row 10: P1, K3, P1, K1, P1, K1
Row 11: P1, K1, P2, K3, P1
Row 12: P1, K3, P1, K1, P1, K1  


In The Round

Row 1-2: P1, K3 
Row 3: P2, K1, P2, K3
Row 4: P1, K1, P1, K1, P1, K3
Row 5: P2, K1, P2, K3
Row 6: P1, K1, P1, K1, P1, K3
Row 7-8: P1, K3
Row 9: P1, K3, P2, K1, P1
Row 10: P1, K3, P1, K1, P1, K1
Row 11: P1, K3, P2, K1, P1
Row 12: P1, K3, P1, K1, P1, K1


Friday, March 24, 2017

March Yarn and Product Reviews

Patons Metallic Yarn

Cost: $6
Composition: 63% nylon, 28% acrylic and 9% wool
Weight Category: 4
Weight and Yardage: 3 oz/85 g; 252 yds/230 m

This yarn was great to work with on the loom, it doesn't have spring but has great drape. Feels like satin to work with. Loops like satin with the sheen it puts off. I would suggest using with a 3/8" gauge loom for projects. Not a bad price for the yardage you get. Divine stuff to knit with on texture alone, gently slips through the fingers and slides through the stitches beautifully, and well woven so it doesn't break apart when knitting with the hook. 

Red Heart Heads Up Yarn


Cost: $5
Weight category: 5
Composition: 80% acrylic/20% wool.
Weight and Yardage: 3.5oz/100g, 106yd/97m

While this yarn was soft, it drove me nuts. It is not tightly woven and likes to split apart a lot when tossing stitches over with the hook. They have vivid colors which is great. Works best with 1/2" to 5/8" gauge looms. It has spring to it, would look good with cabling. Just splits apart entirely too much for my taste. The price is okay, could be better for what you get. Wouldn't really suggest this yarn for anyone.

St Patty's Day Hat

Lions Brand Amazing Yarn


Cost: $5
Weight Catagory: 4 
Composition: 53% Wool/47% Acrylic
Weight and Yardage: 135 m/ 147 yds

This yarn they swear is soft, but I found if rough and feels typical of wool. It is very fuzzy in and while it may be a 4 weight if feels like a 3, probably some where in between. Works with 3/8" gauge best. The color gradience in beautiful but I wouldn't suggest it for small projects, it is going to be best for larger projects as it has a very slow gradience in color. The color I got has a heavy lavender base to it. Not bad to work with but wouldn't be easy to make something for my family as they want soft yarn only. The cost isn't bad for the natural fiber % just keep in mind this isn't the soft wool it is rougher.

 Checkard Heart Socks

Wednesday, March 1, 2017

March Stitch Pattern of the Month Clover Stitch

Clover Stitch


 Terms

CO: Cast On

K: Knit

P: Purl

D: Decrease

YO: Yarn Over

K2tog: Knit 2 Stitches Together

P2tog: Purl 2 Stitches Together

SL/YO: Slip Yarn Over 

K/SL: Knit the Slip

LSBP: Lift Stitch, and Skip Behind Peg Place Stitch Back on Peg.

Flat: 
EWCO 13 (Flat, requires a knit 2 on both sides of the design. You will need to add 2 to the 11 stitch pattern for working flat.)
Knit the first row after cast on.
Row 1: K2, P1, LSBP, SL/YO, LSBP, P1, K2
Row 2: K
Row 3: K2, P2, K1, K/SL, K1, P2, K2
Row 4: K2, P3, P2tog, P3, K2
Row 5: K2, P2, K1, P1, K1, P1, K2
Row 6: K4, P3, K4
Row 7: K2, D-> YO K2tog, K1, P3, K1, D<-K2tog YO, K2
Repeat rows 1-7 over and over
If you would like a separation of the clovers more do a row 8 and Knit straight across.

Circular:
EWCO 11 (Ciruclar you don't need the extra 2 on the end like flat, you are calculating for the 11 stitches.)
Row 1: K2, P1, LSBP, SL/YO, LSBP, P1
Row 2: K
Row 3: K2, P2, K1, K/SL, K1, P2
Row 4: K2, P3, P2tog, P3
Row 5: K2, P2, K1, P1, K1, P1
Row 6: K4, P3, K2
Row 7: K2, D-> YO K2tog, K1, P3, K1, D<-K2tog YO

If you like the stitch pattern please check out this bonnet pattern I made using the stitch on Ravelry: 

March Tutorial of the Month St Patty's Day Hat

St Patty's Day Hat

I will give you the formula to allow you to figure out how to make this hat in any size you would like. It is a fun hat to enjoy the St Patrick's Day Fun!!!!

Items:
loom to fit your head size
looming hook
yarn to work with the gauge of the loom
black yarn
green yarn

Terms:
EW CO: E-Wrap Cast On
WCO: Weave In Cast On
K: Flat Knit
P: Purl
WT: Wrap and Turn
K2tog: Knit 2 Stitches Together
BO: Bind Off
DSBO: Drawstring Bind Off
FGDSBO: Fine Gauge Drawstring Bind Off

Formula

#pegsX2=#A
#A-8=#B
#B/4=#C
#pegs/5=#D
#pegs/2=#E
#E+#D=#F

A is the number of rows you will need to do total for the brim. 
B is the number of rows you will do that aren't corners. 
C is the number of rows you will do between your corners
D is the number of rows you will do in black for your band at the base.  Also the number of pegs you will use for the brim.
E is the number of rows you will do after the band area at the base.
F is the number of rows you will do total for the top of the hat. 

Ex: for 36 peg loom
36 x 2= 72
72-8=64
64/4=16
36/6=6
36/2=18
18+6=24

Lets write up our pattern. 
Note: Always skip the first peg when coming back from the even number rows. Unless you are wrapping and turning then you will need to work the peg. So it will be skip1 purl5. 
Brim First: Flat: 6 pegs: 
EWCO 6
Row 1: K
Row 2: P
Row 3-16: Repeat rows 1 and 2
Row 17: K5, WT
Row 18: P5
Row 19: K4, WT
Row 20: P4
Row 21: K3, WT
Row 22: P3
Row 23: K2, WT
Row 24: P2
Row 25: K1, WT
Row 26: P1
Row 27: K1, K2tog
Row 28: P2
Row 29: K2, K2tog
Row 30: P3
Row 31: K3, K2tog
Row 32: P4
Row 33: K4, K2tog
Row 34: P5
Row 35: K5, K2tog
Row 36: P6
Row 37-52: repeat rows 1-16
Row 53-72: repeat rows 17-36
Row 73-88: repeat rows 1-16
Row 89-108: repeat rows 17-36
Row 109-124: repeat rows 1-16
Row 125-144: repeat rows 17-36
BO 
sew ends together

Weave In Cast On the 36 pegs from the brim
Row 1-6: Black K
Row 7-24:  Greeen K
DSBO or FGDSBO

weave in the tails and you're done!!!

See video for help understanding all this.


March Sale of the Month Baby Outfits and Bundles 60% off

Baby Outfits and Baby Bundles on Ravelry 60% Off Bundle or Pattern

Snow Princess

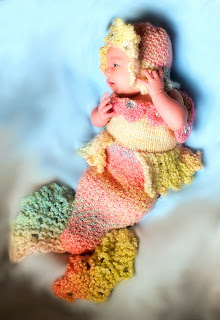
 Mermaid Cocoon

 Fall Bundle In My Heart

 Cabled Baby Bundle

 Beginner Baby Bundle

 Cutie Pie Onesie

Braided Baby Cocoon


Wednesday, February 8, 2017

February Yarn and Product Review of the Month


New CinDwood Wedges 

I found that this product is made solid and have the ability to make loom knitting very versitile. It is easy to function with the washer and nut assembly, and moves fluidly inside the loom when in use. Soo much easier than the Knifty Knitter Clips. I would in fact suggest getting the loom and wedges for some of my older products that folks are finding the clips hard to get. Get the 90 peg 3/8" gauge with 2 wedges, in fact I am thinking about getting 2 more. Everything of my old stuff is possible with this combo. Patterns I have used the wedge with. The Mermaid link and the Snow Princess link


Loops and Threads Powdery


Cost: $4.00
Weight: Bulky (5)
Contents: 85% Acrylic / 15% Nylon
Skein Weight: 3.5 oz. / 100 g
Yardage: 126 yd. / 116 m
It was a simple yarn to work with, and works great with 1/2" gauge looms. The gradient is lovely, and I feel you get plenty of yarn. It has a moderate softness, but is stiff when worked into a garment. You get a decent amount of yardage for the price. You can only get it at Michael's which if you don't have one near you, you can order it. Otherwise it is a lovely yarn for making nice winter hats. I made a bonnet for my daughter.  Link for pattern Here

Premier Isaac Mizrahi Crafts Sutton


Cost: $7.00
Weight: Super Bulky (6)
Contents: 85% acrylic, 15% wool
Skein Weight: 4 oz. / 113 g
Yardage: 68 yd. / 62 m
This I felt was a pricey yarn, and you get very little yardage. I was barely able to make a full hat with the stuff. It is soft for a wool blend and has a wonderful gradience in color but I just wasn't happy with how little for the price. Don't plan to sew too much with this yarn it will fall apart if tugged on too hard. It fuzzes up a lot just wearing the garment. I honestly wouldn't suggest this yarn for anyone. It was rather a pain to work with because it wanted to fuzz a lot. If you do want to use it, it is best used on 1/2-5/8" gauge looms. You could use 3/4" gauge as well. I made a hat with it click here for the link for the pattern.