For a write up on what this blog post is about, for several years at this point I have quite drawing, and if anyone has known me my entire life, it was a huge part of my life. So to have quit is never a good thing. I have chosen that I will not do any more commission drawings for anyone, no more trying to make my drawings a career, and start drawing for myself again. The reason being is I spent too much time trying to please others with my skill, and the disappointment and rejection that I got killed the love for me. I want to find the love again for my art. My challenge for the next 90 days is even if it is for only a couple of minutes, I am going to draw everyday for 90 days. In that 90 days I will post each day what I have achieved for the day. For the next 90 days this post will be added to everyday. My goal remove the anger and hatred in art and bring back the love and soul for me in it. Wish me luck!!! This evening I will post my first day.
November 6th Day 1:
Start off drawing my son for the 1st time. It was done in ball point pen. Had quite a bit of anxiety drawing, and also cried through the middle of it. Mostly because I haven't drawn my son til now and so many times from when he was born I wanted to draw him but never did until now.
November 7 Day 2:
Didn't really feel up to drawing, because yesterday was busy busy, but decided add color to the 1st drawing of my son. I used Prismacolor colored pencil.
November 8 Day 3:
It seems I can never get to pumpkin carving til after Halloween, but this is the drawing for today. This carving feels better than last years and the year before last. Then again I am into owls right now pretty good.
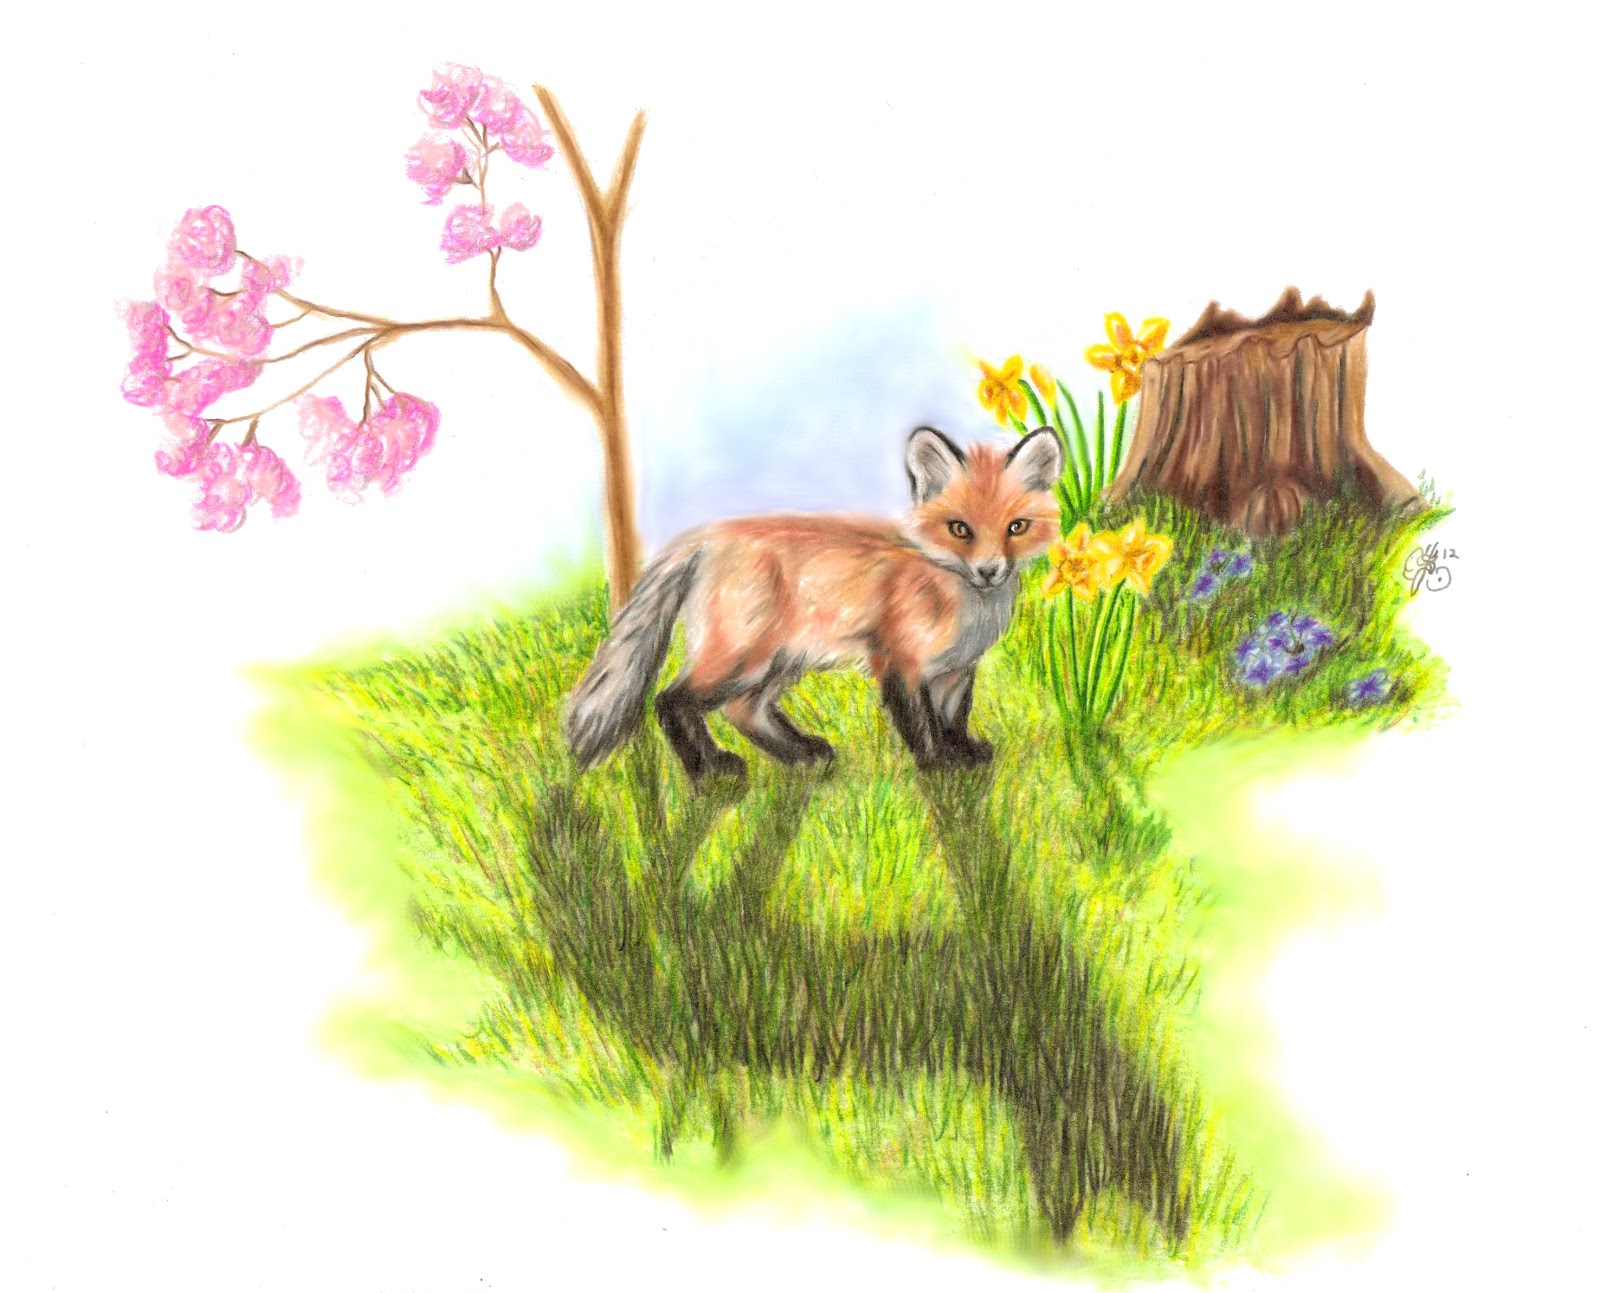
November 9th Day 4:
November 10th Day 5:
So far I have just been drawing straight out, no draw and oval then draw the lines where the features go, just drawing. Pen and ink yesterday and today. Want to start getting back into some color at some point. Also trying to work on less is more.
November 11th and 12th Day 6 and 7:
Rule of thumb, now that I have a child put away the drawings till you are working on them. The face was done on the 11th, and the wings were added on the 12th. I was going for a creepy owl woman illusion, but it just isn't flowing, since my son decided to put some purple stipple to it, I am going to call this idea a fail.
November 13th Day 8:
So inspiration is getting hard right now for me. This was a dragon I was working with, it is actually a good dragon from working from my head. Normally not too good but this one came out. Will go back and work on adding color to it.
Inspiration used to be Pin-Ups but not really feeling the sexy in my soul anymore. Still love looking at pin-ups. Mermaids, Fairies, and Fantasy creatures used to be an inspiration when I was a teenager. But not really feeling the subject right now. Interests as of late for me are belly dancing, owls, dragons, and stuffed animals, no interest really in drawing belly dancers, I find that photos really do them justice. While I enjoy making stuffed animals don't know the point in drawing them. I like owls and think they are more of an inspiration, and while I love dragons they don't visually in my head come naturally to me. I will on the other hand probably try to play with working on dragons, as it will be a good challenge and work for me brain.
November 14th Day 9:
No drawing to show, I took my son to the doctor but drew a tree with crayons while we waited on the doctor to show.
November 15th Day10:
Played with some drawing apps yesterday a lot. Figured why not try drawing on a tablet. It doesn't have the same feel as a pencil to paper for sure. Crazy thing is I do better drawing on the table with my right hand better than my left. I typically draw with my left. Not really inspiring on the tablet will probably go back to a more traditional method of drawing.
November 16th Day 11:
This was me still playing with a drawing app, but working from a photo this time. Haven't gone through my super fancy program to do some more cool stuff with it but might get there at some point.
November 17th and 18th Day 12-13:
So decided to spend a couple of days just shading in this dragon, working with images from my head instead of photos. I prefer it this way because I don't feel as though I am copying anything or anyone. Can't say I stole it if it came right out of my head. The dragon turned out really good for me, normally I am not very good at drawing dragons.
November 19th Day14:
Well the most I could do today was sketch a quick tree on paper with a crayon to encourage my son to draw on the fresh paper I taped onto the coffee table.
November 20th: Day15:
Really struggling to draw, just not inspired, having a hard time. The best I could do is work on a color works design of music notes and stuff for a loom knitting project
November 21st: Day 16:
Absolutely nothing so day 16 will have to be carried over to the next day. :-(
November 22nd Day16:

Decided to buy a new larger sketch pad with thick paper today, as well as decide that my inspiration will be owls for now and allow the flow to go from there. I have really resisted drawing lately, struggling, and going deeper inside myself to find out why I just don't want to. Honestly have been struggling with myself and my likes, dislikes, and personal feelings about myself. Used to believe that my soul and myself was very connected to my art when it was my choice to draw what I wanted. Sadly that sounds so stupid, but am beginning to wonder about how true that is. Art for me was always therapy, got what was inside out of me. So is it me? Is it my soul on paper? Maybe... I have been having troubles with soul searching and loving myself lately. But I will say I am obsessed with owls, not the silly pictures but the owls themselves. There is a certain wonder and soul to the expression in the eyes in them. Beautiful textures and fascinating essence. If I can capture that maybe I can recapture myself, flow from owls back to other things. Lets me how this goes. It certainly more internal work than I would have expected.
November 23rd Day 17:
Decided to sketch out my next drawing and am planning on adding color rather than just drawing in black and white.
November 24th Day 18:
Here is the owl completed in marker, it has been so long since I have colored in marker that my fiance has never seen me draw in marker. For so long I have been sticking to black and white, feeling rather black and white, but I know me to be more colorful than that, it is time to add some color back to my soul. Time to find the vibrancy again.
November 29th 30th December 1 Days 19, 20, 21:
Well I took 4 days off for Thanksgiving, but this is 3 days worth of drawing a little here and a little there. The 1st day I sketched it out, the 2nd day I filled in the black areas, and the 3rd day I filled in the rest of the color. Adding the black and color felt more like scribbling as crazy as it may sound, but I will say I like the results.
December 2, 3, 4, 5, and 6th Days 22,23,24,25,26
This took me several days sketching and filling in to complete. It has incorporated a photo, but have taken it upon myself to change and add to the photo to create something I like a little better. So far since I am almost a month in, I have noticed a calming inside, a resurgence of sensuality, a happier over all mood. Feeling clearer, and deeper in thought. Who would have thought art was all this for me.