The Muse Scarlett Yvette Royal

The Muse Scarlett Yvette Royal

Monday, October 19, 2015

Loom Knit Sweater Poncho


Sweater Poncho


Items:
150 peg 1/2 gauge S loom
60 peg 1/2 gauge loom
3 skeins of Lions Brand Scarfie Yarn
Looming Hook
Crafters Needle

Terms:
CO: Cast On: E-Wrap the amount of pegs it calls for.
EW: E-Wrap: The process of taking the working yarn and wrapping from back to front and back again.
P: Purl: The process of taking the working yarn pulling it up through the bottom of the stitch and taking the original stitch off and placing the new stitch on the peg.
D: Decrease: The process of taking the end stitch and placing it onto the next peg with a stitch on it.
ID: Internal Decrease: The process of taking every other stitch and placing it onto the next peg. When you are done every other peg should have 2 stitches on it. EW all the pegs with stitches tossing both loops over.
COF: Cast Off: The process of EW pegs 1 and 2, place loop 2 on peg 1, toss bottom loop over. Move loop 1 to peg 2 and EW pegs 2 and 3, move loop 3 to peg 2, toss bottom loop over, move loop 2 to peg 3. Repeat till done.

Panels: 150 pegs: Flat:
EW CO 30 pegs
Row 1: P1 EW1
Row 2: EW1 P1
Row 3-15: Repeat rows 1 and 2
Row 16: CO 58
Row 17: EW88, CO58
Row 18-38(20rows): EW146
At this point Decrease by 1 on each end EW the row, then EW a row, repeat this till down to 64 pegs. (Note: you are decreasing by 2 every other row.)
ID64to32
place stitches on a stitch holder.
Repeat another panel like above.

Neck: 60 pegs: Circular:
Then place your stitches on the 60 peg 1/2" gauge loom, 2 stitches on each side will overlap each other. Make sure when placing the stitches on the loom that the right side is facing you and the wrong side is facing the inside of the loom. EW1 P1 for 50 rows, COF.
Sew up the front, back, and cuffs of the poncho.
You're Done!!!

Tuesday, October 6, 2015

Loom Knit Crocodile Stitch Patterns!!!!

http://scarlettroyale.webs.com/
 These are a few patterns I have created using the crocodile or scalloped stitch on the looms.  By clicking on the picture it will take you to the link to get the pattern. The patterns are in PDF format and include written instructions, as well as video tutorial links for help making the patterns.
A lot of the patterns were done on CinDwood Looms which are great because they come in the 1/2" gauge great for making a nice tight knit.
This stitch adds wonderful texture and life to a pattern. Yes it is time consuming, and yes it does take a lot of yarn, but man is it worth the look and feel of the finished product!!!
The owl gloves pattern below is soon to come out, but check out the owl booties while you wait!!!

http://www.ravelry.com/patterns/library/owl-bag-10http://www.ravelry.com/patterns/library/crocodile-or-dragon-booties


http://www.ravelry.com/patterns/library/crocodile-or-dragon-booties

http://www.ravelry.com/patterns/library/owl-booties-3

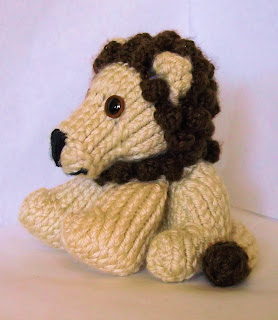
http://www.ravelry.com/patterns/library/lion-29


Loom Knit Owl Bag


 This owl bag is based off of my previous designs of the Realistic Owl Hat and Stuffed Owl patterns. The bag is completed in 1 piece with minimal sewing that is done on the face. I used the 60 peg 1/2" gauge CinDWood Loom, and Bernat Blanket Yarn in Moss, Baby Yellow, and Black. It is a large bag great for a school bag for a child. Or a carry all bag for your baby or toddler.
The pattern includes written instructions, as well as video tutorial for help in making this pattern. The links are always located below the image in the PDF file you recieve. There are pictures showing generally what an area of the bag should look like at a certain point. I would not suggest this pattern for a beginner or even intermediate loom knitters. This is an advanced pattern that used stitch holders, keeping up with 2 different stitch pattern while adding wrap and turn techniques at the same time, and also doing a half and half color change. There is a lot to keep up with in this pattern. Stitch markers will be used, and row counters.
The pattern may be complicated but it is well worth the effort to create such a cute pattern for a child or even yourself!!! I am providing alink for the buy now below to get the pattern. It is $4 for the pattern.


http://scarlettroyale.webs.com/

Loom Knitted Fall Leaves Poncho

 
This pattern became an inspiration from seeing some of Suzanne Sullivans leaf designs. I will include links when you click on the picture, if you needle knit if you love her patterns so you can purchase them. I became inspired and thought, all you need is the leaf to start. So this pattern is made up of 28 leaves and a turtle neck all sewn together to make a poncho. But this base pattern can make sooo much more than just a poncho. Please feel free after you purchase to play, make blankets, scarves, capes, and what every you can imagine with them. Have fun!!!
http://www.ravelry.com/patterns/library/leaf-capelet-leaf-caplet

http://www.ravelry.com/patterns/library/leaf-wrap-scarf
 So now the loom knit community can join in on this wonderful idea and play and enjoy the pattern too!!!
Pattern is done with a 24 peg and 60 peg 1/2" Gauge CinDwood Looms
Plus I used 10 skein of Lions Brand Chenille in Opal.
http://scarlettroyale.webs.com/


Friday, September 11, 2015

Loom Knit Wolf, Cat, or Fox Ears


Wolf Ears

Items:
24 peg loom
looming hook
crafters needle
Red Heart Boutique Fur Black and Gray
Scrap black yarn for sewing up
Head Band to attach the ears to.

Terms:
2PEW: 2 Peg E-Wrap: Sending the yarn behind 2 pegs and then the front of 2 pegs and back around to the back. Basically EW 2 pegs for a single stitch.
D: Decrease: Moving a stitch from 2 pegs to the next 2 pegs on the ends.
CO: Cast On: 2PEW

Ear: 20 pegs: Flat: Black
2PEW CO 10 stitches
Row 1-2: 2PEW
Row 3: D1 2PEW, 2PEW6, D1 2PEW
Row 4: 2PEW
Row 5: D1 2PEW, 2PEW4, D1 2PEW
Row 6: D1 2PEW, 2PEW2, D1 2PEW
Row 7: D1 2PEW, D1 2PEW
Row 8: D1 D1 2PEW
Row 9: 2PEW
Snip end pull through

Inner Ear: 16 pegs: Flat: Grey:
2PEW CO 8 stitches
Row 1-2: 2PEW
Row 3: D1 2PEW, 2PEW4, D1 2PEW
Row 4: 2PEW
Row 5: D1 2PEW, 2PEW2, D1 2PEW
Row 6: D1 2PEW, D1 2PEW
Row 7: D1 D1 2PEW
Row 8: 2PEW
Snip end and pull through.

Line inner ear up with the bottom of the ear, then make sure there is a nice border of black around the inner ear. Sew the inner ear in. The fold one side or the other of the ear where the point on the end is in the middle of the ear, tac it down. Now sew onto your headband. Make 2.

You can easily make the ears smaller by using a less bulky yarn. Also feel free to use a thinner yarn that is a size 5 or 6 in bulk. If you want a tighter stitch keep the number of pegs just EW instead, and just make sure the decrease by 2 stitches on each side rather than 1. 

Tuesday, September 8, 2015

Skull Sock Booties


Skull Sock Booties


Tutorials for toe and heel area: https://youtu.be/BD4p809eg9s

Items:
30 peg loom
looming hook
2 skeins of yarn in contrasting colors

Terms:
KCO: Kitchener Cast On
K: Knit
WT: Wrap and Turn
CC: Change Color
D: Dark Yarn
L: Light Yarn
COF: Cast Off

Dark yarn: KCO 30 pegs: circular:
Row 1: K
Row 2: K29, WT, K13, WT, K12, WT, K11, WT, K10, WT, K9, WT, K8, WT, K7, WT, K6, WT, K6, K7, K8, K9, K10, K11, K12, K13, K14, K15, K15
Row 3: K
Row 4-30: Follow Color Chart Below

Row 31: CC D Repeat row 2
Row 32: K
Row 33-46: D K1, L K1
Row 47-49: D K
COF

Saturday, September 5, 2015

Loom Knit Animal Scarf from Existing Patterns


Items:
24 or 12 peg loom
looming hook
1 or 2 skeins of yarn

Terms:
DSCO: Draw String Cast On
EW: E-Wrap
BOLB: Bring Original Loops Back
ID: Internal Decrease
DSCOF: Draw String Cast Off

Bear Pattern Written:

DSCO 24 pegs Circular
Row 1-5: EW
Row 6: EW10 (tail: EW4 4rows, EW3, EW2, EW3, EW4 4rows, BOLB) EW10
Row 7: EW2 (Leg: EW4 25rows, BOLB) EW12 (Leg) EW2
Row 8: EW
Now EW for 4ft to 2yds
Repeat Row 8
Now we are going to start working the head which is knitting flat.
Row 1-9: EW
Row 10: EW6 (Ear: EW4 4rows, EW3, EW2, EW3, EW4 4rows, BOLB) EW4 (Ear) EW6
Row 11-16: EW
Row 17: ID from 24-12
Row 18-23: EW
DSCOF
Sew up legs, and bottom of head. Hot glue on eyes and your done.

When transfering the regular stuffed animal patterns on the 24 peg loom to make a scarf, follow the instructions for the body just like above, the only difference is changing the tails, then when you get to the top of the body after the head. Follow the instructions for making the head just like if you were making the stuffed animal, it is just your start is already ready for you. You can follow the videos exact for the heads.  


For a cat, dog, or rabbit pattern and to transfer them to a scarf follow the instructions.
Here is the link for the patterns of the Cat Dog and Rabbit
.
For the lion, giraffe, monkey, or elephant here is the link to purchase the Safari Collection.

Examples of other 24 peg animals you can use. 

Fox, Owl, Eeyore, GoatHorse


12 Peg Loomed Animals 

Bear Scarf from Mini Bear
DSCO 12 pegs circular
Row 1-3: EW
Row 4: EW5 (tail: EW2 4rows, BOLB) EW5
Row 5: EW1, (Leg: EW2 15 rows, BOLB) EW6 (leg)  EW1
Row 6: EW
Now EW for 4ft to 2yds 
Repeat row 5, then we will start on the head and working flat.
Row 1-5: EW
Row 6: EW3, (Ear: EW2 5 rows) EW1, (ear) EW3
Row7-9: EW
Row 10: ID 12 to 6 pegs
Row 11-13: EW

DSCOF
Sew up legs and bottom of head and glue on eyes. 


Follow the instructions for the body above and then follow the head only EWing instead of knitting, from the other animal videos using the 12 peg looms. The scarf will be thinner but if you like a lighter looking scarf this is just for you.  

Here are examples of other 12 peg patterns. 

Pikachu, Cow, Donkey, Horse , Pig, Alpaca, Sheep, Hello Kitty, Dog, Cat, Rabbit, Elephant